My web host is 1&1 – I joined up with them a couple of years ago because they were doing a ‘free year’ offer, and my then web host (UKHosts) had really annoyed me by being hacked (and whoever did it had deleted all the index files and main images)… but not telling me until some of my clients complained their websites were down, and I called them! (And see the comment right at the end of this article – looks like it may have happened again.)
The old “we tried to call you when it happened” crap didn’t cut any ice with me.
Anyway, the great thing about 1&1 is that if you email them with a technical query (or any other type of question come to that), they respond within an hour. UKHosts used to ignore their emails and it was always the same guy who eventually dealt with any query after you’d eventually lost your temper and sent an arsey email. Plus, their phone was permanently engaged or otherwise on answerphone – which they also never used to respond to.
Anyway, I use WordPress to run this blog. Every so often there is an upgrade to fix bugs or add new features, and so far that hasn’t been an issue. However, with the last upgrade you can only run WordPress from a MySQL database version higher than 4.1.something (I forget which now). Mine was 4.0.something.
My account allows me to create MySQL 4 and MySQL 5 databases, and in the recesses of my mind I seem to have a recollection that WordPress specifically mentioned MySQL 4 when I first set it up. Therefore, I was running WordPress from the earlier version of a MySQL database.
Creating a new MySQL 5 database was easy – but it was empty! I needed to be able to transfer my old database data into the new one. Everything indicated that this was a walk in the park. An absolute doddle. After all, I had made periodic backups of my database, so I could restore the site quickly if anything ever went wrong. Well, all I can say is, I am bloody happy that I never had to do that. I had plenty of fun and games doing what appears to be a simple operation.
The only criticism I would have of 1&1 over this was their FAQs. Basically, they are wrong (unless they have updated them as a result of my problem). At best, the FAQs are incredibly misleading – missing out spaces on instructions for command line operations is a guaranteed disaster – and command line systems are not known for being logical in the first place.
Anyway, without going into huge detail over what went wrong, here is how to do it right (and it was 1&1 who sorted this out for me). I will assume you have created a new MySQL 5 database from within your Admin Panel.
First of all you need to back up your old database. Go to yourAdmin Panel, go to the MySQL Admin area, and choose the database you want to back up:

Select Your Database
In the PHPMyAdmin area, click on “Export”:
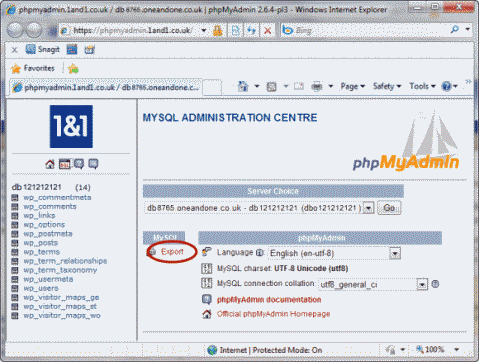
Export The Database
In the database window (shown below), leave everything unchanged except for the tick box (circled) – you want to save your file – and make sure the SQL option is selected:
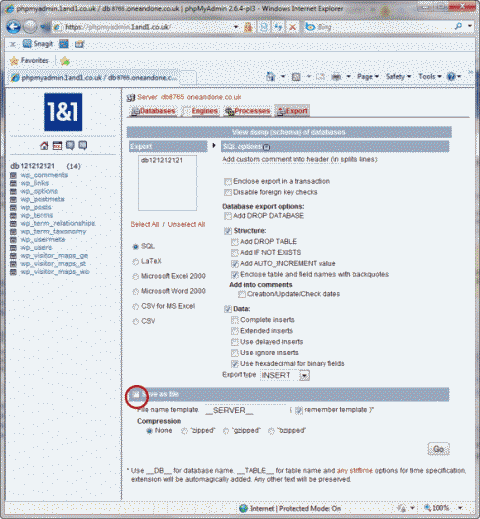
Select Settings And Save File
Just choose somewhere to save the file where you can find it (call it something simple like ‘dump_db’), then click GO. This will create your backup file.
Now you need to use your FTP client to upload the ‘dump_db.sql’ file to the root directory of your webspace – that’s the highest level you can go to, above all your folders for your websites.
All of this was the easy part. 1&1 has various FAQs for importing the dumped database, but none of them worked for me. It turned out my database was too big (it was less than 7MB, but they’d told me it just needed to be less than 9MB for the standard import from MyPHPAdmin to work).
If you are lucky, clicking on the SQL button will allow you to browse your PC for the dumped file and restore it from there. But I wasn’t lucky. I had to use SSH to complete the restore.
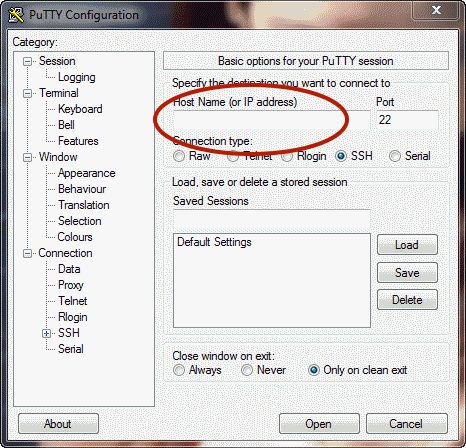
I downloaded PuTTY (an open source telnet client). You just run this program from the downloaded file – it doesn’t install anything to your PC. When it opens, it looks like this:
Type in your host name – it’s the name you use in your FTP client and will be something like ‘ftp.yourdomainname.co.uk’. Make sure SSH is selected, then click ‘Open’. You will now get the telnet window, like this:
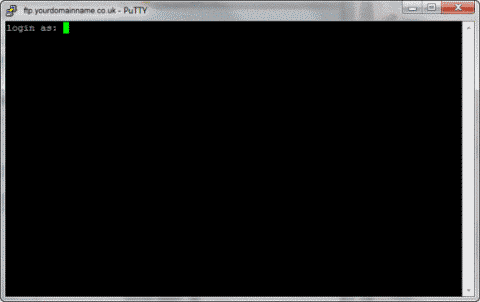
PuTTY Telnet Window
At the prompt, type in your username (again, the one you use to access your webspace using your FTP client – with 1&1 it’ll be something like ‘u50012345’), then press ENTER. Enter your password (same as your FTP again), and press ENTER. You’ll now see something like this:
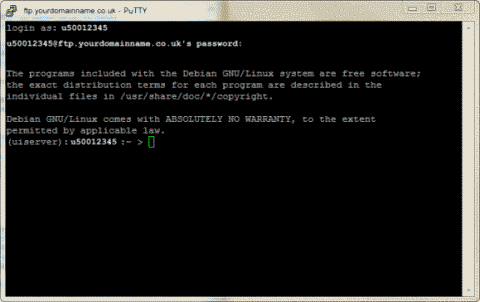
Logged Into Your Server
Now you’re ready for the most important – and most tricky – part. You’ve got to run a command to copy the dumped database into the new one. It has to be typed EXACTLY right using the EXACT parameters (this was one of the confusing parts of the FAQs, because the usernames and passwords are not what you’d expect unless you’ve done this before).
Look at your list of databases again (in your MySQL Admin area):

The Database List
Those values I have highlighted are the database name, the database username, and the database host name. You’ll also need a password – and this is one which you set up specifically for SSH from your main Admin Panel. Note that the names are for the MySQL 5 database – the one you want to copy your dumped data into.
At the prompt in the telnet (PuTTY) window, you must type the following. It has to be exactly like this (substituting the relevant data from your Admin Panel):
mysql -h db9876.oneandone.co.uk -u dbo343434343 -p db343434343 < dump_file.sql
Let me just repeat that, but highlighting the spaces you must type using the symbol “• ” in red:
mysql• -h• db9876.oneandone.co.uk• -u• dbo343434343• -p• db343434343• <• dump_file.sql
Press ENTER, then type in your SSH password when prompted, and press ENTER again. The command will execute and your new MySQL 5 database should now contain all your dumped data.
EDIT 03/01/2010: I noticed someone searching for “how to open an sql file and edit”. This is quite simple – you need to use a text editor that doesn’t alter the file by adding headers or messing with file extensions. Notepad++ is an open source program and works perfectly for this and other code editing.
EDIT 22/1/2010: In the last two days I have had several hits on the search term “ukhosts hacked”. My experience was well over a year ago (I’ve been with 1&1 for over a year, and I changed to them directly as a result of the example I gave at the start of this article). I can only guess that UKHosts has been hacked again.
If anyone knows, use the Contact Form from the menu above and give me the details.
