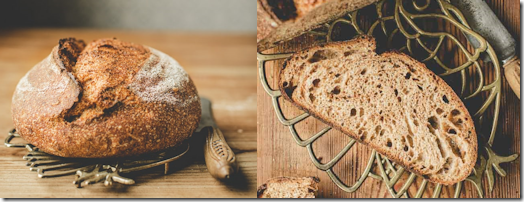
After the preamble in Part I, and the production of the Anstellgut in Part II, we’re now down to the serious business – making my first loaf of Vollkornbrot.
There will (eventually) be a few more pictures. The recipe I’m using is very simple, and is given below.
In a suitable bowl, beat the starter, salt, and water until frothy and well mixed. Add the flour and mix either by hand, or with a stand mixer. You just need to make sure everything is thoroughly combined – no need to knead or develop the gluten (there’s not much gluten in rye flour).
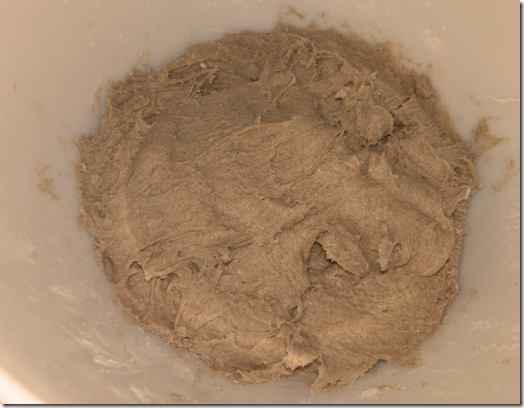 What you end up with can only be described as a sticky mess, but that’s OK because it’s exactly what it should look like. I’m glad I went with my Kenwood, because if you get any on you it sticks like all get out! Cover it with a tea towel and let it rise at room temperature for 10-12 hours.
Turn it out on to a well-floured surface and shape it into a round. Mine had risen by more than twice its original volume, but was still as sticky as hell. The phrase ‘turn it out’ is a bit of an oversimplification, too – most of it fell out, but there was still a layer stuck in the bowl, so I scraped that out with a spatula. I tried flouring my hands to prevent it sticking when I was shaping it, but that was no good, and I’ve since discovered you need to wet your hands with cold water when handling rye dough.
Gently place the dough into a well-floured proofing basket (mine has a canvas liner).
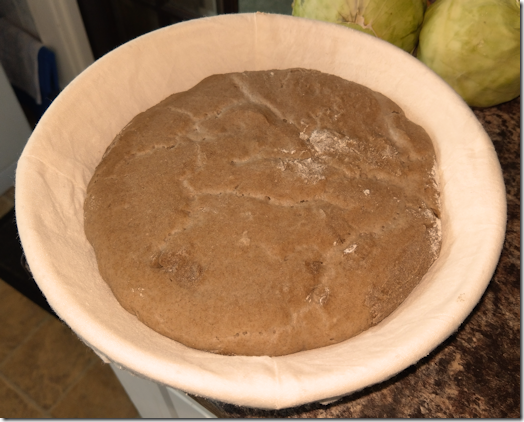 Let it rise for 60-90 minutes uncovered, until cracks appear on the surface. Mine rose again noticeably during this time.
Preheat the oven to the highest temperature you can (Gas Mark 9). Place a pan of boiling water on the bottom shelf to provide steam. Flour the top of the loaf and gently tip it on to a baking tray (the canvas liner released it readily, which was a huge relief).
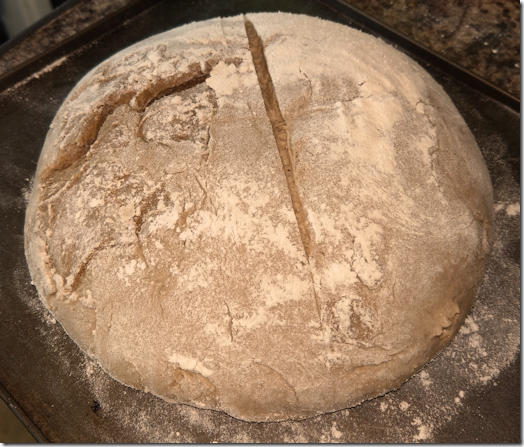 I put one shallow slash using a sharp knife through the dough’s ‘skin’ to be on the safe side, though it cracked by itself. Drop the oven setting to Gas Mark 8 (230°C) and put the loaf inside. Total baking time is 50 minutes.
After 20 minutes, remove the tray of water.
For the last 10 minutes, open the oven door a little – just slightly ajar.
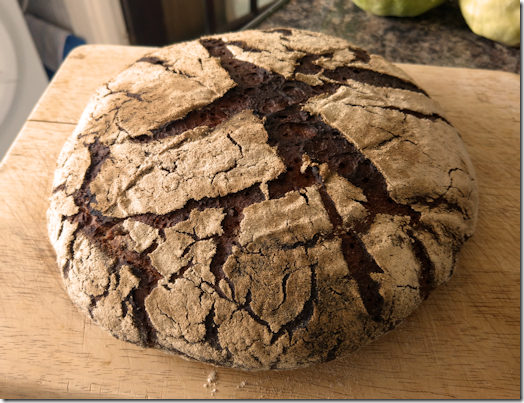 This is what the result is straight out of the oven. It’s exactly what I was after – on the outside, at least. It’s identical to the authentic German loaves. And after letting it cool right down…
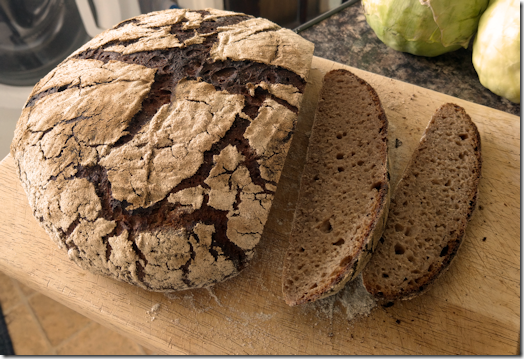 Yes! Result. It has a nice tangy taste (which is one that you need to acquire, so be warned) and the crumb is pretty much just as I wanted it.
It’s amazing, really, that just 10g of the Anstellgut did all this. Many of the American recipes – and a lot of the British ones – use a tonne of the stuff. I guess that is to speed up the proofing time so it rises faster and (sigh) attempts to get ‘grape-sized holes’ – as I saw one American trying to do in a rye bread only last night – in the crumb. They also have complicated multi-stage processes which revel in terms you have to look up, but the one I found is as simple as you can get. And it works.
This long slow rise is authentically German, and it results in an even, dense, and authentic crumb.
When I make my next loaf (or subsequent loaves), I will add to the images here depending on how clean I can keep them looking (and as I hone my skills) so you can see the different stages.
Also, I was so desperate to cut into this one to see what it was like, it was still slightly warm. Apparently, you’re supposed to keep them for 24 hours before cutting into them, and I’ll do that in any future attempts.
What is ‘room temperature’?
Say, between 20°C and 25°C. If it’s less than that, it will rise much more slowly. I discovered that on the 2nd loaf, when we’d gone from around 20°C outside to less than 10°C, with indoor temperatures down pro rata.
How do you stop it sticking to your hands?
Cold water is definitely the answer. I initially tried flour, but it was no good at all. But running my hands under cold water, then quickly shaping the round and dropping it into the proofing basket was simple the second time. Just don’t go overboard with it.
My loaf has a dense or damp bottom
Assuming that it’s fully cooked, make sure you let it cool on a wire rack – not on a solid (and especially, a cold) surface. If the base cools too quickly, moisture in the loaf condenses, and that makes it denser or even soggy at the bottom.