Archive - June 2021

Review: Going Paperless With DoogleBooks

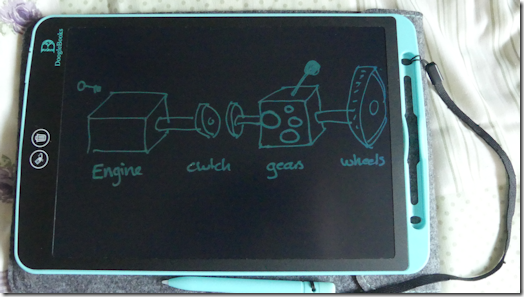
DoogleBooks LCD drawing and writing padEver since I became an instructor I’ve managed to get through a lot of notebooks. Anyone who does this job will know that you have to sketch a lot of things when you’re explaining stuff to pupils.

I started off buying notepads, but realised that was quite expensive – especially if you wanted the larger sizes. Then I turned to making my own, by ring-binding punched copier paper and using that. I discovered that normal two- or four-hole punching was no good, because the sheets could easily get torn with all the handling and jolting they get in the car, so I turned to spiral binding. That served me well for many years – but I was starting to feel my conscience nagging me over the amount of paper I was getting through.

A few years ago now, I tried using my laptop. It’s a Surface Book Pro with a detachable screen so it can be used as a tablet. With a simple sketching app, it was fine – but there was still the hassle of getting it out, booting up, then detaching the screen, then reattaching it and powering down when I’d finished. There’s no way I wanted my Surface loose in the car while it was moving and quite frankly – in some of the places you have to cover – waving a two and a half grand laptop around is not the smartest thing you can do.

Then I had one of my thoughts. It occurred to me that there must be something out there that could just be used as a drawing board, but which didn’t involve dirty rags covered in black marker from the dry-wipe boards some people use. That was when I came across LCD drawing pads. At the time I first tried them, they were usually 6 inch or 9 inch screens. I found a 10 inch one and it worked great. I still have it, in fact. But a couple of years ago, while still looking for something better, I came across DoogleBooks.The main attraction at the time was its size – it’s a 12 inch screen, so about the size of a piece of A4 paper. It also boasted an erase function (you can erase parts of your diagram with an eraser on the stylus) and a bright screen – my original cheap import was quite faint, though still perfectly usable. It comes with a padded protective case and a separate eraser, a lanyard for the stylus, and some spare tips, and a few bits and pieces for kids rather than adults (and which I never did figure out what they were for).

It is powered by – believe it or not – a standard watch battery, which lasts ages (I’m still on the original after nearly two years). That’s because the device is not illuminated in any way, so doesn’t draw much power.

You ‘turn it on’ with a very small switch on the back, though this is a ‘lock’ function rather than a power button as far as I can tell. The stylus clips neatly into the frame (come to think of it, it was because the clip on the cheap one I bought snapped which got me looking again) and has a nice long lanyard so you don’t lose it.

Once powered/unlocked you just write or draw whatever you want. The width of the stroke is governed by pressure and angle of the stylus nib, so you can get thin lines or thicker ones as needed. If you want to start again, you just press the button on the left in the picture above with the trash can symbol twice, and the screen is cleared. The double-press is a safety feature so you don’t erase by mistake – see the next bit for why.

If you make a minor mistake, you can erase just part of whatever you’ve drawn or written. Press the other button until the red LED comes on, then use either the small rubber eraser on the other end of the stylus, or the larger rectangular one which is supplied – just like you would with pencil on paper. Once you’ve erased whatever you want, press that button again until the LED goes out and you’re back in drawing mode. Due to the proximity of the buttons, you can see why complete erase needs two presses. This selective erase does work, but be aware it does leave slight smudges behind – again, like you’d get with a pencil on paper.

It is not a computer. Anything you write or draw exists only on the screen for as long as it’s there. You cannot transfer it to a computer, since it is not a digital image – it is exactly the same as a pen or pencil drawing. If you write ‘CAT’, that’s just some shapes and lines – the tablet doesn’t know what you’ve written. If you erase something by mistake, it’s gone forever – there’s no undo feature. If you want to save anything, you can take a picture – pupils often take a shot of things I draw so they can look at them later, just like they used to when I drew on paper.

The device I used previously had a much fainter screen, and this meant that on evening lessons it could be difficult to see what you’d drawn. As I explained earlier, there are no backlights on these things, and they are literally the same as pen and paper – you can’t see drawings made using those in the dark, either. However, DoogleBooks has a much brighter screen contrast and you can see your drawings clearly with the interior light on. The photo above was taken at dusk with no lighting, and that’s the contrast you get.

It’s been one of the best things I’ve bought in a long while. I actually have a spare in reserve, which came about because the original Amazon order never arrived, and the owner of the British company which sells them sent out a replacement. Several weeks later, the other one arrived – God knows where it had been – and when I offered to return it the owner said to keep it as a gesture of goodwill!

They now do several different models, mainly aimed at kids, with different screen colours. And whereas the only frame colour available when I bought mine was cyan (which is actually my least favourite colour in the whole world), they now do them in a range of colours. Just be careful to choose the ‘’partial erasure’ one unless you want to save a couple of quid and lose a bit of functionality.

It’s infinitely better than using a dry wipe board. There’s no mess, and it is ready to use the instant you take it out of its case. Unlike dry wipe systems, when you erase, you erase – no ink getting stuck in scratches, which always happens with dry wipe markers. And the stylus lasts oodles longer than a marker pen. And there’s no thick pads of drawings to dispose of when you’ve filled up a notepad.
Karma, Scooter. Karma.

[vplayer id=27733]

Nottingham City Council is trialling the use of e-scooters in the city. Everyone knows that approval will be given for them to be introduced, no matter what negatives the ‘trial’ throws up. Indeed, in the last couple of months in Nottingham, there was the case of a visually-impaired woman who was injured by one, and more recently a woman sustained suspected fractures after one hit her.

There have been several cases of riders themselves crashing into things, or having things crash into them. In one recent case, a taxi collided with a scooter, and the rider sustained life-threatening injuries. Another recent one involves claims by a woman who said the scooter snapped as she was riding it. In another recent case, the police had to swerve to avoid a student who was drunk and riding one just before he crashed. And in another recent case, an 8-year old was found riding one.

This is just a very small sample of very recent cases just in Nottingham. Travel further afield, and the story repeats in all places trials are being conducted – plus anywhere where scooters are being used illegally.

Last week, I was on my way to a pupil in Beeston. As I turned on to University Boulevard from Dunkirk, I noticed a scooter in the right-hand lane. It quickly registered that he was travelling at the same speed as the traffic. He was too far in the distance to pick up properly on the dashcam, but he was zipping in and out of traffic, all of which was moving freely at 30mph. When I reached the 40mph section of that road, he appeared to cut in front of a lorry, and then shot off. He was actually going faster than me in a 40mph zone!

But anyway. I caught a couple of scooters on the dashcam tonight, and this is the best example of karma you could get.

I’d picked a pupil up in Clifton and we’d just driven away from his house. As we approached the end of the road to join Swansdowne Drive, I noticed a scooter go past. As we got closer, another followed him. We turned out on to Swansdowne and the scooter riders were all over the road in front of us. They were on the wrong side, even near a parked Police car. I warned my pupil to be careful, as they were doing it on purpose to prevent us getting by.

The best part was when the lead scooter tried to zip on to the pavement and missed the dropped kerb. He went flying arse over tit. I seriously hope he hurt himself – injury is is the only punishment these twats have to worry about, since the Council and the Police won’t do anything. But it was perfect karma.

Neither of them was old enough to have a provisional licence – one of the requirements for hiring a Wind scooter. Neither was wearing the provided helmets. Both were riding illegally, and outside the terms of Wind scooter trial.

And Nottingham City Council will approve them.

The Audi Lane – Correct Usage

Many moons ago, I wrote an article coining the term ‘the Audi lane’. It went semi-viral at the time. Here is a perfect demonstration (for Audi drivers) of how to use it.

[vplayer id=27774]

I was on my way to pick up a pupil and was driving along Wilford Lane. The speed limit is 30mph there, but as we all know, speed limits are only ‘advisory’ for Audi drivers. The black Audi (registration number SAZ 2723) was in the right-hand lane (which is a right-turn only lane) at significantly more than 30mph. And it was raining heavily.

He (or she) stayed in the right-hand lane on the roundabout, and then – without any use of indicators whatsoever – turned left off the roundabout into the estate (which is straight ahead, and requires the left-hand lane on approach if you’re doing it even close to properly).

This is absolutely the correct way to use lanes and roundabouts if you are an Audi driver.

PayPal Here Card Reader

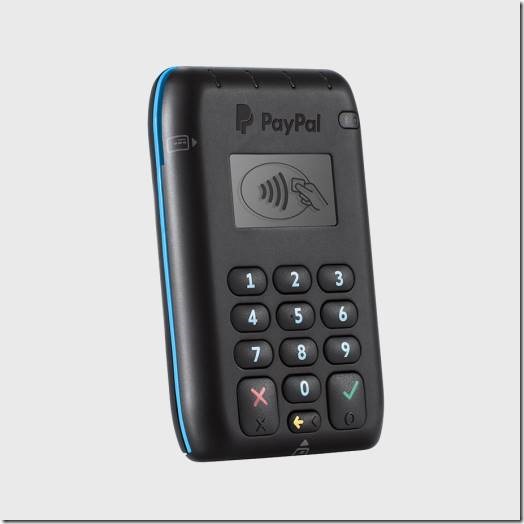
PayPal Here card readerThis article was originally written in 2015. Prior to PayPal Here, I had used iZettle, but I had an extremely (and I mean EXTREMELY) unfortunate experience with them – and one which has become more significant to me as of 2023.
PayPal bought iZettle in 2018. The situation as of 2021 in the UK was that PayPal directed you straight to iZettle readers if you wanted to buy a new machine. They also stopped taking on new ‘Here’ customers.

As of 2023, I got a missed phone call from PayPal in early March warning me PayPal Here readers would stop working at the start of April and to get a ‘Zettle’ (the new name) card reader. They can f**k off. I would not touch iZettle again if you paid me.

I have now (March 2023) switched to SumUp, and so the following article should be considered void, as you cannot get PayPal Here anymore. I still strongly recommend not touching iZettle/Zettle if you can avoid it.

Note that the following article is specifically aimed at card readers per se, and not with the issues I experienced with iZettle when it was an independent company.

Since 2015, I have taken close to £80,000 in card payments through PayPal Here (it’d be closer to £100,000 if not for COVID). As time has gone by, the number of people paying me by card has increased dramatically, and right now well over 90% of pupils pay that way. The rest still use cash – and very occasionally,  someone will hand over up to £700 in notes to pay for a block of lessons). One or two use bank transfer.

I do not take cheques, and haven’t done since 2015 – if someone can write a cheque, they have a bank card I can read in the car. That means I get paid immediately, and there’s no risk of a bouncing piece of paper. These days, the only real reason for anyone to want to use a cheque is to defer payment, and I don’t play that game anymore (it’s too risky). The other problem with cheques is that I have to go to the bank to gain credit from them – which is also true of cash if I accrue too much – or I have to piss around with photographs and smartphone apps, which I also don’t want to do.

The PayPal Here card reader can carry out transactions via contactless, PIN, and swipe (though swipe is not necessary in the UK). All you need to do is buy the card reader outright, download the app, connect the two through Bluetooth, and you’re set to go. With PayPal, the money is in your account within  seconds.

Although attitudes have improved since 2015, there are still instructors who – for various reasons often associated with avoiding HMRC scrutiny – are against taking card payments, prefer cash, and who then try to justify their position with lies and misinformation based on their own ulterior motives.

For me, being able to take card payments impresses the majority of pupils. It’s like you are performing a magic trick in front of them, and they marvel at the machine when they use it. Taking card payments also ensures you being paid for the lesson you just gave. I mean, let’s face it – the only two business-related things a decent and respectable ADI needs to worry about when dealing with the financial side of their services is happy pupils, and being paid on time.

BACS is better

BACS is a viable way of taking money, but it isn’t ‘better’. It relies on the pupil ‘remembering’ to do it, and often needs at least one chase to make sure it happens. If it doesn’t, you’re then into either more chasing, or cancelling the lesson if you insist on advance payment (so you lose money anyway).

I recently (June 2021) gave refresher training to someone who passed with me before the pandemic. On one lesson, he paid me in cash (which is now in my wallet, and will need a bank visit at some point). On the second, he wanted to pay by BACS, so I gave him my bank details via text message while he was still in the car (minor hassle #1). One day later the money had not arrived, so I texted him (minor hassle #2). He replied that he had sent it (the money miraculously appeared while I was replying (minor hassle #3) that he must not have ‘fast transfer’ on his account). I immediately texted him that I had got it (minor hassle #4). Most likely is that he sent the money when I chased him, and if I hadn’t, he wouldn’t have sent it until I did. If he’d have paid by card, it would have been done and dusted before he left the car.

BACS would be better if you could trust everyone. If you want to trust up to 20-30 pupils at any one time, that’s your business. But you are deluding yourself if you believe you won’t have problems trusting pupils to use BACS, since the ball is always in their court at some point.

How long do PayPal Here payments take to clear?

For all practical purposes, they’re instant. They appear in your PayPal account within seconds. And when you transfer your PayPal balance to your bank account, that also occurs within seconds. My only minor gripe is that you have to transfer the money from PayPal to your bank manually.

How much does the card machine cost?

Right now, with PayPal, I’m not sure. PayPal is currently in a confused mess involving iZettle. When I used iZettle (before PayPal acquired it), it could take up to a week to receive money into your account. With PayPal Here it is in within seconds. I would like to think that the same is now true of anything to do with iZettle, but I cannot be sure.

Is there a monthly rental fee?

No. You buy the card reader outright and only pay a fee per transaction.

How much do they charge per transaction?

With PayPal it’s 2.75%. For each £29 lesson paid for by card, you ‘lose’ 80p. iZettle charged 1.75% per transaction when I used it. I am not sure how it works now with the confused mess PayPal has created, and been slow to clarify given that it purchased iZettle in 2018.

PayPal takes 23p for each £1 you take

NO. THEY. DON’T. YOU. IDIOT.

I saw some clown state this on social media, and it’s bollocks. On a £29 lesson, the fee is 80p.

Other card reader vendors have lower fees

I’m not saying you must use PayPal. Just be aware that other vendors’ fees are often on a sliding scale (iZettle’s was when I used them),  and you only get the lower rates on anything above the threshold they set. When I was with iZettle, virtually all my lessons were charged at the highest fee rate. I triggered iZettle’s lower rate fees a couple of times, but the lower rate only applies to takings above the threshold, and for driving instructors that is not going to happen regularly.

For example, if there is a threshold at takings of £5,000 per month, and you pay 2.75% up to that, and 2.5% above it, then if you take £5,500 in that month, you pay 2.75% on £5,000, and 2.5% on £500. To get any real benefit, you’d need to be taking £10,000 per month or more. Small multi-car driving schools might benefit, but a self-employed ADI wouldn’t.

What other alternatives are there?

SumUp is an alternative card reader provider, and has a fee of 1.69% per transaction. It takes 2-3 business days to get your money. A reader costs about £30.

Another alternative is Square, with a transaction fee of 1.75%. Apparently, money goes into in your account immediately. A reader costs less than £20.

I use PayPal because I like PayPal. However, if they don’t sort out the ridiculous confusion over whether they are now PayPal Here or iZettle, and clarify that iZettle’s pathetic system I had previous experience of is gone, then if all three of my PayPal Here readers were ever to fail, I would switch to someone else. I need to be able to take card payments, and I want the money immediately. That’s all there is.

Some vendors have no fees

And they keep your money longer before paying it to you to get their cut. There’s no free ride when it comes to clearing card payments. Someone somewhere has got to pay for it. And let’s face facts: it’s going to be you in the end.

The charges are a rip off

Fine. Keep taking cash and cheques, and pretend it doesn’t cost you anything to have to go to the bank to pay it in, or chase anything that bounces.

I can charge a ‘transaction fee’ to cover charges

No you can’t. It’s illegal. Just price yourself so you can cover the transaction fees you pay overall from your income, and stop trying to forecast it to the nearest fraction of a penny.

But I can save money if I don’t have to pay transaction fees

As I say. Fine. Keep taking cash. You probably also believe your car isn’t an overhead because you own it (it is an overhead, even if it is 20 years old), and that if you don’t have to pay a franchiser then you’re better off by the whole franchise fee (you’re not, because you still pay overheads, even if you don’t realise it). A card transaction fee is an overhead, that’s all.

I can’t see the point of taking card payments

Fine. Keep taking cash. This is how older or less clued up ADIs think, though.

What about cheques?

What about them? No one has attempted to pay me by cheque for at least 6 years now. Even before that, a cheque was often a way of paying for a lesson before they ‘got paid on Friday’ because they knew it would be at least a week before it was requested from their account. If someone can write cheques, they have a cheque guarantee card, and that has a chip & pin on it these days. If they use the card with my reader, I get paid instantly. If they use a cheque, I have to piss around getting it to the bank, and then hope their account will cover it when it gets requested.

I can take pupils to a cashpoint

Good for you. I’m sure they absolutely adore paying for a driving lesson which – in part – involves stopping to withdraw money every week. For me, my card machine is the cashpoint. In fact, on a couple of occasions, I have avoided having to go to a cashpoint because the pupil needed it for personal reasons nothing to do with the lesson, and handed them cash out of my wallet in return for a card transaction. It helped me avoid a bank trip, and the pupils were extremely impressed.

Is it of any benefit to take card payments?

It has saved me a lot, both in monetary terms, and in terms of my sanity trying to find a parking space near the bank or standing in a queue while stupid people take tens of minutes of the one cashiers’ time at my Halifax branch.

Another benefit is less tangible. Pupils are often impressed if you pull out an iPad and have a glitzy demonstration video to get some point across, for example. It’s exactly the same when you tell them you can take card payments.

Make Your Own Doner Kebabs

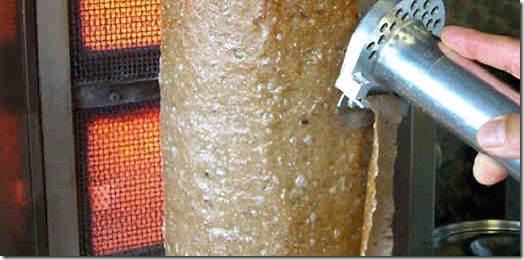
Doner Kebab meat being slicedI first wrote this in 2017, but it’s had a run of hits lately. And I’m just making another batch, so an update seemed in order.
I like cooking, and I especially like to be able to reproduce food that I would normally end up paying an arm and a leg for if I went out and bought it from a restaurant or takeaway. I can make curry that tastes almost identical to those you get from an Indian Takeaway, and I can make pizzas which are also identical to takeaway ones.

Doner Kebabs (or ‘gyros’ if you’re in the USA) were always on my ‘to do’ list, but my previous attempts weren’t successful. Membership of various local cash & carry outlets means that I have access to the kinds of things you wouldn’t find on supermarket shelves, and I’ve seriously considered buying a whole doner leg (that’s one of those big things that slowly turn around in front of the grill at the kebab shop). If I’d have been stupid enough to do it, God only knows what I’d have done with 10kg of cooked doner meat – and yes, even the thought of buying a proper doner grill passed through my mind more than once. But genuine satisfaction could only come from being able to make doner meat from scratch.

The few goes I had were a hell of a palaver. It was all about mincing lamb breast twice, forming patties, pushing them inside an empty tin can, cooking it, then using a blow torch whilst turning the mini-doner leg on a fork and slicing layers off. Even the pictures that accompanied one of the recipes I tried (and note that the flavour of this was very good, if you’re wanting to make your own seasoning mix) showed that the final slices of meat were coarser-textured and nothing like a proper slice of doner meat. That’s how it turned out for me – the taste was pretty much spot-on, but the cooked meat was crumbly and had no ‘bite’ to it (and frankly, I wan’t that interested in farting around with a mini-doner leg, I just wanted the meat) The worded version of that same recipe suggested that commercial preparations ‘probably’ use transglutaminase – or meat glue – to hold the texture. That sounded somewhat plausible and I’d planned on trying it, when out of the blue the answer came from… bacon. Why bacon, you ask? Well, I had started curing my own bacon and I needed some curing salt. Whilst searching, I came across Surfy’s Home Curing website as a source. While browsing Surfy’s site I noticed that he also sold Doner Kebab Seasoning, and with my previous failed attempts in mind, I asked a few questions about the texture problem I’d experienced. That’s where the key piece of information came from: temperature.

In a nutshell, the most critical part to getting the texture right when making doner kebab meat is the temperature you do the mixing at. It has to be very, very cold, almost freezing – but not quite.

I can vouch for Surfy’s Kebab Seasoning, but you can get other brands. Some of them are commercial mixes so they should be fine.

Making Doner Kebab Meat

Surfy’s Kebab Seasoning, comes with a handy recipe for doner meat. The recipe is so simple that I couldn’t believe it was going to work, but I decided to give it a go exactly as it was written to see what happened.

I bought two 500g packs of lamb mince from Asda and stuck them in the freezer along with a bowl of water. When the water had just started to freeze (therefore acting as a crude thermometer), I threw the mince into my Kenwood Chef fitted with the K blade, added 50g of the kebab seasoning, and mixed on a medium-high speed until it became sticky and of a uniform texture (just like pink bread dough, in fact). Then I added 50g of the ice-water and mixed for a minute more, also on medium-high speed. Apart from the hour or so in the freezer beforehand, it took less than 10 minutes to produce the meat mixture in accordance with Surfy’s Recipe.

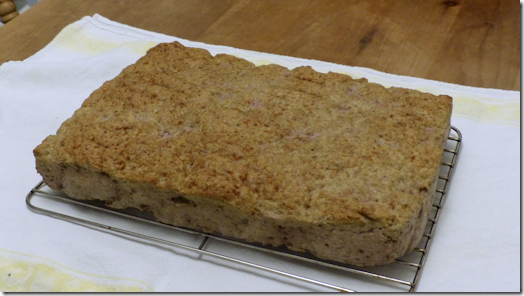
As I said above, I wasn’t in the least interested in producing a weird shape I’d have difficulty cooking and handling, so I packed the mixture firmly into a non-stick loaf tin by hand. Rather than just roast it, I decided to use a crude bain-marie, so I placed the loaf tin inside another tin and half filled that with boiling water and placed it in a pre-heated oven at Gas Mark 4. Using my Meater probe (any thermometer will do), I let it cook until the inside temperature reached above 75°C. Once removed from the oven, I drained off the rendered fat and let it cool a little.Slab of cooked DIY kebab meat

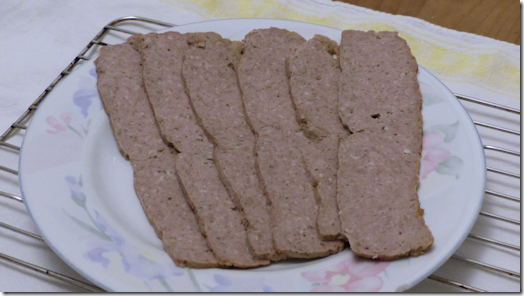
As soon as I cut into it I could immediately tell that I’d cracked the texture problem. It was firm and held together perfectly. And when I tasted it, it was identical to shop-bought kebab meat in both taste, smell, and texture. Once it was completely cool, I used my bacon slicer to slice it up into strips. The cooked loaf was about 220mm x 110mm x 65mm (i.e. slices were about 2½ inches wide).Slices of cooked kebab meat ready for reheating or freezing

I rolled the strips between parchment paper so that I could remove as many as I needed, and froze the roll for future use.

Making The Actual Kebabs

Re-heating can be done under the grill, in a pan, or in the microwave. Just don’t do it for too long, otherwise the strips dry out (though you might prefer your doner meat that way). Personally, I like mine juicy, so 30 seconds or so in the microwave gives you perfect moist strips.

I’ve typically like my kebabs on Pitta Bread, but I always find it a bit hit-and-miss over whether a pitta will puff up or not. Recently, Asda has started selling Naan Wraps, and these are absolutely perfect. They’re now my preferred bread for kebabs (until Asda stops doing them, as is their wont).

One of my kebabs will therefore be a naan wrap, 3 or 4 slices of meat with my favourite sweet chilli sauce on top, then finely sliced red and white cabbage, onions, peppers (that’s my own addition), onions (red or white), tomatoes, cucumber, and Iceberg lettuce. You can put as many vegetables on it as you like. And that’s it.

Costing

I estimate that 1kg of lamb mince produces enough doner meat for up to ten kebabs – admittedly, perhaps not if you put the same amount of meat in you get from takeaways, but that’s probably a good thing because they are usually into pig-out territory anyway. At £8 per kg of mince, plus £0.60 for the seasoning, each serving of meat comes to about 85p. With all the other stuff, you’re looking at well under £1.50 per kebab – and it’s a full, healthy meal. You’d be looking at £5-£6 in a takeaway, and a lot more fat.

Nutrition

No one is ever quite sure what goes into commercial kebab meat. Even taking away concerns about the actual animal the meat in them comes from, they are loaded with additional fats (often trans fats) that have been added eat during manufacture. And since we’re looking at commercial production, chemical additives (sodium phosphate, in particular) are used, quite possibly along with synthetic flavourings in some cases. In short, you simply don’t know what you’re eating – just that you’re eating a lot of it (and you know you shouldn’t).

The only fat in this homemade meat comes from the lamb. The Asda lamb I bought contains less than 20% fat in the first place, and a lot of that is rendered out during cooking (which I pour away). It contains nothing except lamb and the seasoning.

I estimate that each homemade kebab weighs in at no more than 800 calories, even on a large naan (less on one of the Asda wraps I mentioned). On a pitta it’s closer to 500 calories. Indeed, the majority of the calories come from the bread and not the meat. It’s no more than a typical meal, and a lot healthier since it contains a lot of vegetables.

If you were on a 2,000 calorie diet, you could have up to three of these as your main meal without any worries. A shop-bought kebab, on the other hand, could contain the full 2,000 calories in one go.

Could you cook it over a grill like they do in the shops?

Yes, of course. As long as you made sure it was properly cooked as you sliced it, the raw mixture could be formed on a spit, and rotated over or in front of an open flame to cook it. I haven’t tried it and have no desire to, but if you packed it tightly and then chilled it I’m sure it would be firm enough to put on a spit. Come to think of it, that’s how a takeaway I used to use many years ago did it – I watched him one day taking handfuls of meat mix out of a bowl, forming them into discs, and then throwing them on to the skewer of the large spit as he formed the ‘elephant leg’ a layer at a time. If you really, really want to go for the poseur approach, you can buy devices to do it. I’m not quite crazy enough to go this far, though I am crazy enough to have been tempted. Sorely tempted, I assure you.

Can you freeze cooked doner meat?

The recipe given above is cooked from fresh ingredients. If it is frozen quickly afterwards it’s fine for freezing. Just don’t let it hang around too long before you slice and freeze it. And never re-freeze it once thawed.

Freezing doner meat you bought in a kebab from a shop is definitely out. It was probably frozen to begin with, and you have no idea what the hygiene standards were when you were sold it. You don’t need me to tell you what the insides of kebab shops are like, and eating fresh from them is OK, but leaving it around for too long is asking for trouble.

Is it possible to buy doner meat already made?

Yes. Some cash & carry outlets sell tubs of cooked meat frozen. You can buy it in some supermarkets in smaller packs. It tastes fine, but it is relatively expensive compared with DIY.

What gives doner kebab meat its texture?

It’s all in the preparation. The meat has to have about 20-25% fat and it has to be very cold – almost freezing – when you do the mixing so that it can emulsify (i.e. the meat and fat are no longer separate). When you press it down into a mould or tray and cook it as described above, the texture is just right – not at all crumbly, but firm with a definite bite to it.

Network Attached Storage (NAS)

During the lockdown I was watching films and TV shows I’d downloaded and ripped from DVD. I prefer to watch videos on my TV rather than my computer most of the time, and I use Plex as my preferred media server.

Plex is great, but I was suffering from buffering problems when using it. A lot of others have, too, and from what I have deduced it isn’t specifically (or just) a problem with Plex, but partly with Wi-Fi. It is worse when you are watching 4K content, for example, because Wi-Fi just can’t handle the bandwidth in some cases – especially when you have several devices using it at once. Buffering was driving me insane to the extent that I tried various alternatives to Plex. But nothing comes even close to it for features and ease of use. The last straw was when I was watching Kill Bill: Vol 1 for the umpteenth time, it kept stopping during the fight scenes when a lot was happening and the required bandwidth went up.

How Plex works is this. You install Plex Server on your chosen computer, and tell it where your movies and other stuff is stored. Then you install Plex client on your smart TV, Firestick, or whatever, link it to your server, and you can watch your shows whenever you like. Most people will opt for Wi-Fi networking to eliminate the need for wires trailing everywhere in order to connect their devices.

I’m a bit of a Wi-Fi sceptic. I mean, it’s fine when it works, but it often doesn’t. The other thing is that my internet connection is 600Mbps, but there is no way Wi-Fi can match that. It doesn’t matter in most cases – when connecting devices to the network for updates and so on – but it does if you actually need the fastest connection for something. Or if you’re trying to stream high-bandwidth films.

Last year, I bought an Ethernet adapter for my Firestick (from where I run Plex client) and connected it directly to my router. Buffering disappeared, so that was one problem more or less resolved.

However, a related issue was to do with storage. My PC, which I built myself just over a year ago, has two 1TB SSDs and one 2TB SSD. You’d think that 4TB would be enough space (I also have a spare 2TB SSD which I was planning to install), but I then realised I’d got around 3TB of movies and TV shows, with the entire box set of Frasier still to rip at some point, which will add probably another 2TB. SSD is an expensive way of increasing storage, and you still have the potential for a disk failure eventually, which means you lose everything on it (I got stung with that previously when we had a power cut that blew my last self-built machine). I needed something bigger and safer Now, I said I was a bit of a Wi-Fi sceptic, but I am a full-on ‘cloud’ sceptic. The idea of trusting all of your files to the cloud just doesn’t make sense to me. For one thing, it is expensive if you want a lot of storage (Amazon used to offer an unlimited cloud service, but it was being abused and they stopped it). And unless you pay for it (I assume), the cloud is sloooooow. I have a 1TB OneDrive account through my Office365 subscription and if I want to download a movie file from it I can assure you it isn’t downloaded at anywhere near to my 600Mbps internet connection speed. Uploading such files is worse because of the massive difference in upload speeds even with your ISP.  Then you need to factor in how fast your cloud is going to let to have the file – usually at about a tenth of that speed if you’re lucky – and it’s a nightmare. The download also seems to be proportional to how urgently you need it – if you’re desperate, you can virtually guarantee an outage somewhere or download error.

I’d been considering a NAS (Network Attached Storage) solution for a while. This is just a storage system you maintain yourself. I wanted to be able to store and access large files immediately – not tomorrow, after several failed tries. I also wanted to be able to work on them where they were stored – just like on your PC – and not with the extra steps of having to download them first, altering them, then having to upload them again. A NAS is exactly what it says – a disk storage system that is on your network, and not someone else’s.Synology DS1821+ NAS

Be aware that a NAS is not a cheap solution to begin with. Once you have it, it is virtually free, but a NAS enclosure starts at around £150, and disks to populate it at around £70 each. I opted for the Synology DS1821+ DiskStation 8-bay, which costs just under £1,000.You can set up a NAS using single disk drives, where each drive acts just like one in your computer. However, if the drive fails at any point, all your data are lost. I’ve been bitten with that before, as I mentioned. I wanted better security, so I wanted a RAID system – where you use multiple disks to either ‘stripe’ the data or ‘mirror’ it. This is where you have to trade off the level of security/safety against reduced capacity. For example, if you simply ‘mirror’ across two disks (RAID 1), then you might have two 1TB disks which have the exact same data on them, which is secure if one fails, but you only have 1TB capacity, even though you have two 1TB disks. To cut the story short, I wanted RAID 5, which needs at least three disks to ‘stripe’ the data, but which gives you the capacity of two of them whilst still retaining all data if any one of the three fails. Weighing up the prices of the available disk drives against my likely storage requirements I bought three 12TB HDDs at a cost of £270 each. This would give me 24TB of storage, with the additional data security I wanted.

A NAS is essentially a PC – a computer. It runs its own operating system, which on the Synology is called DiskStation Manager. It is just a black box you put on your desk, and you access it through a web interface in your browser once you’ve connected it to your network via the router. Installing the hard drives is easy, and once you’ve plugged in the necessary cables and turned it on, finding it it and adding it to your network is also easy. Various guides take you through setting up your chosen RAID configuration, and that is very simple too. After that, all you have to do is map your drive from Windows on your PC and you can use it.

An additional detail that cropped up was when I accidentally pulled out the plug for the NAS one time, and the system reported an unexpected shutdown after rebooting. It also warned that this could lead to data loss and disk corruption – a major alarm bell for me – so I got a UPS (Uninterruptible Power Supply) to prevent that happening again. A UPS is a battery backup system, and I already have one for my PC after that damned power cut blew all my disks. I chose an APC unit which has a data link that the NAS can interface with and perform a controlled shutdown if the power fails and the battery runs out. It cost £110.

I now have a neat system where I have 24TB of storage that I can access at network speeds. I can access it as a normal ‘disk drive’ from my PC, or via the internet on my laptop or smartphone if I wish, wherever I am. It is connected by cable to my Firestick, so there’s absolutely no buffering. My data is more secure than if I was operating on single drives (and I’ve been caught out with that previously, as I mentioned). I can expand if I need to. It is my own ‘cloud’.

I have installed Plex server on the NAS, and linked Plex client on the Firestick to it, and there is no buffering whatsoever. All my content is now on the NAS. And if I want to work on a file, it is just on another drive which I can access whenever I want. No more download, fiddle around, then upload.