I wrote just over a month ago about how Virgin Media had had a major outage, and it dragged on for days. I thought we were up-and-running again.
Then, around midnight on Sunday, Outlook told me it couldn’t connect to the email server. It was still doing it when I got up Monday. And to cut to the chase, it is still doing it now – Tuesday midday.
No f*cking email whatsoever for a day and a half so far.
I went to Downdetector and saw that everyone else was having problems. Many of them had contacted support, and as the day passed had been told it would all be fixed by 2.10pm, 4.20pm, 7.30pm… and I gave up checking after that.
After the last outage, I’d drafted a letter to Virgin’s Head Office, but I didn’t send it once everything was working. Well, I’m sending it this time.
Update: Email went down late Saturday/early Sunday (17/18 June). Virgin gave repeated fix times throughout Monday and Tuesday, and missed every one of them. By Wednesday (21 June), they have given up on giving ETAs to miss, and have now said Friday (23rd).
I placed my order with Reolink in the early hours of Monday 5 June. The package arrived on the morning of 7 June – though I was still in bed and missed it (in part due to the Ring not sending chime alerts anymore), so they re-delivered on 8 June. Obviously, this is UK stock.
You will remember what I said in Part I about being an early adopter. I had emailed Reolink to confirm that the doorbell would connect to third-party equipment (they told me it would, and even provided a link to a guide on how to connect it to Surveillance Station, which is the security software I use). I also asked about being able to buy additional chimes.
The response to this was not what I’d hoped – but was what I had pretty much worked out for myself when I ordered: at this time, the doorbell only supports one chime unit. It’s not a showstopper, and I am certain that support for multiple chimes will be added in future firmware updates, since it is bound to be a popular user request.
The first important detail is its size. It is only 48mm wide, compared with the Ring’s 60mm. As a result, it will fit on the flat 50mm part of my uPVC doorframe on my house where bell pushes are supposed to go in the UK, instead of side-mounted on the porch wall using stacked wedges to get the correct FOV (field of view), which I had to do to install the Ring. The Reolink comes with a mounting plate and a 15° wedge (mounting screws are included). The wedge is so that it can be angled slightly to point towards the visitor instead of straight forward.
Ring seems to cater primarily for American customers, who can usually fit them anywhere convenient along wooden outside walls. In the UK, walls are usually made of brick, and doors are often recessed into porch ways and have quite narrow door jambs, beyond which it is brick. Even in new-builds, with doors that open directly on to the street, the jambs are still narrow. Obviously, screwing something into wood or uPVC is quite easy, whereas brick requires a hammer drill and Rawlplugs. The Ring doorbell doesn’t fit the standard UK door jamb (it’s too wide), and needs to be wall mounted in most cases, which is what I had to do in 2020, using multiple wedges to get a good viewing angle from a 90° position relative to the door. If you have a Ring doorbell, people know you have a Ring doorbell, because it is big. In my case, it was even more obvious. The Reolink doorbell, by contrast, is relatively discreet and fits on to the jamb.
Early adopter comment: right now, the Reolink comes in black. I know that they will do a white one at some point – they’re going to have to – but mine is black, and will go on a white uPVC doorframe. Again, this is not a showstopper for me, but bear it in mind.
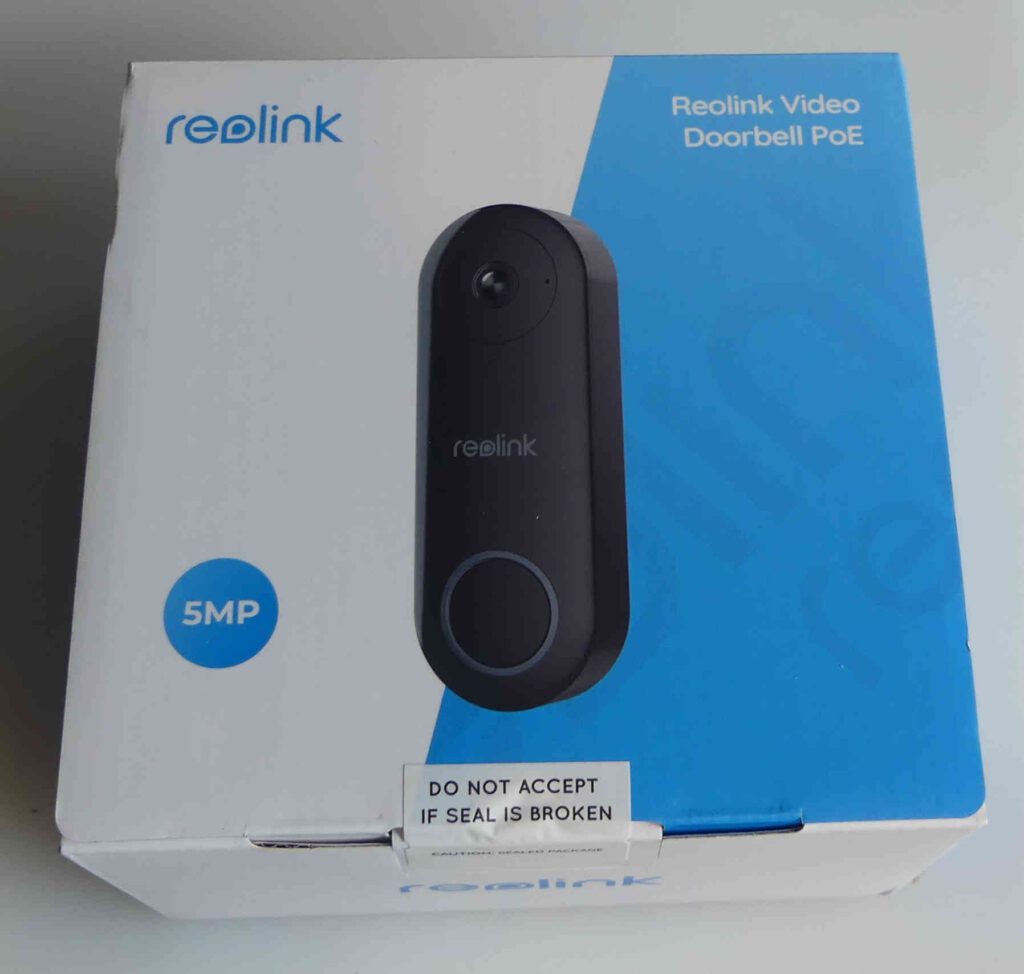
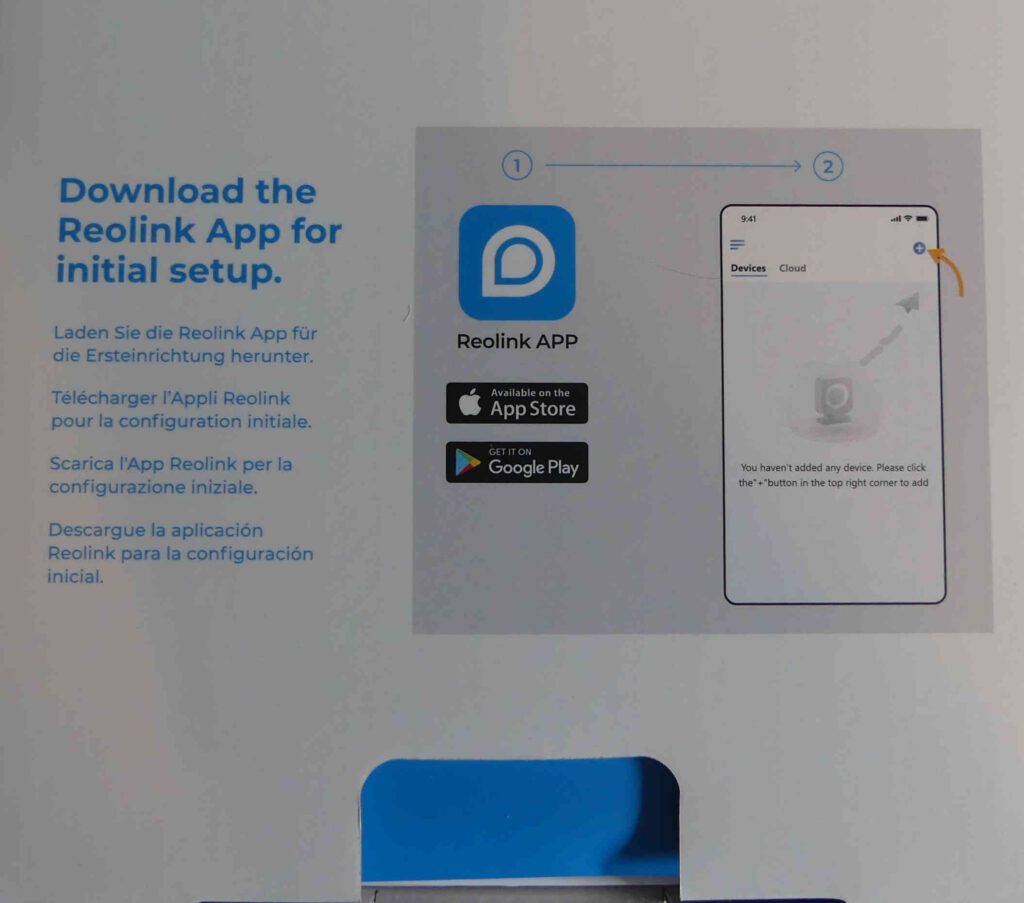
Unboxing: It comes in a neat box with a security seal. I draw your attention to the message on the inner lid – to download the Reolink app when you do the initial install. Any camera which has inbuilt security uses a similar method – you can’t just plug in your ethernet cable and expect it to work, because it is almost guaranteed not to (my experience installing Hikvision CCTV cameras taught me that).
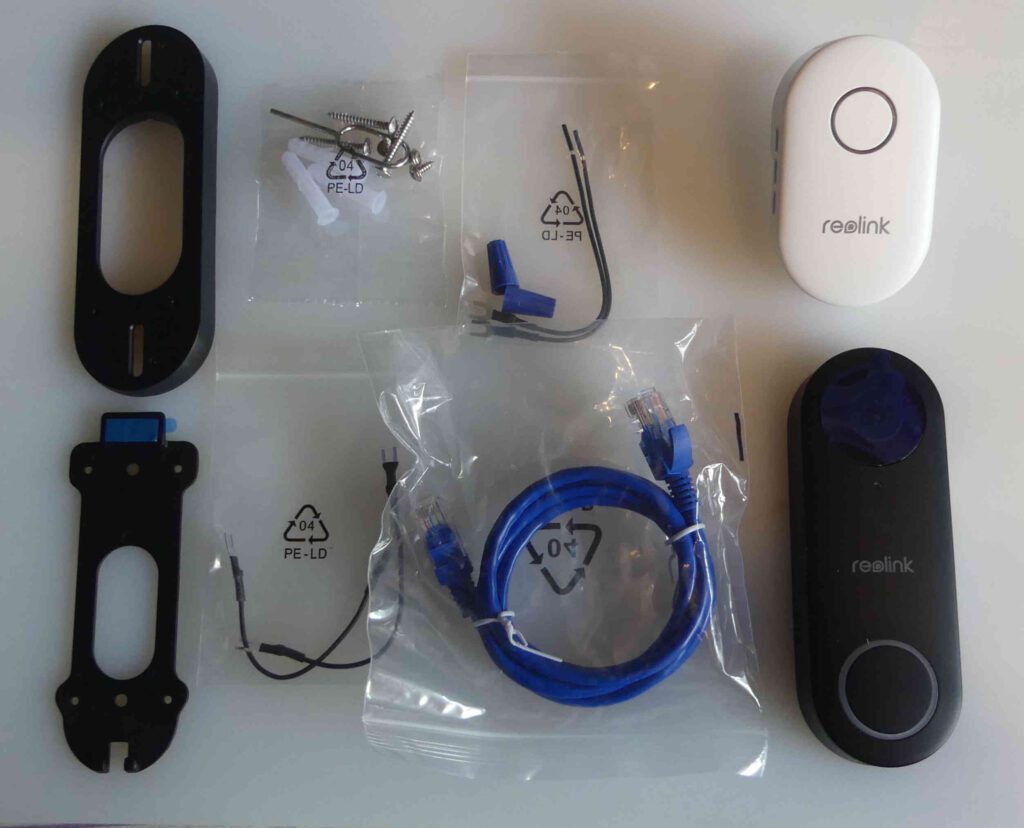
Inside, there is an envelope containing the instruction manuals for the bell and the chime. The doorbell and the chime unit are underneath this, and in the lower compartment you have a short ethernet cable, the mounting plate and optional 15° wedge, a pack of screws and Rawlplugs, and two packs containing spade-ended cables for powering it using a transformer (those will be surplus to my requirements).
Initial Setup: I downloaded and installed the Reolink app on my Android smartphone, and set up an account on it.
The next part was a simple three-step process.
connect the camera to a PoE network switch
add a device on the app
plug in the chime
At each stage, there are clear on-screen instructions. Mine connected flawlessly first time. It was far less problematic than when I installed the Ring – which repeatedly refused to connect, and took multiple attempts to get the install process to run through to completion. And let me repeat for clarity: you need a PoE network switch or a PoE injector. A normal ethernet port does not supply power over ethernet.
Early adopter comment: right now, I have it powered using the supplied ethernet cable. This cable is somewhat more flexible than the ones I normally use, but it also has a shorter strain relief grommet. I will likely have to do a little careful trimming with a scalpel to shorten the grommets on my outdoor ethernet cable, because they are too long to get into the PoE socket on the doorbell as they are (they also cause problems when using waterproof ethernet enclosures).
So, I had a working doorbell system on my phone and with the chime.
Setting up with Synology Surveillance Station: Having the camera working through my network and accessible on Surveillance Station (SSS) was absolutely the most critical part, and the whole reason I purchased the Reolink. And it was where things didn’t go quite as smoothly as I’d hoped – at first.
I checked my router and found the camera’s IP address. It was quite a low number, but fortunately wasn’t conflicting with anything. Nevertheless, I logged into the camera’s settings and switched it to ‘static IP’, then chose a number in the range I use for my other CCTV cameras. I strongly advise you do this, since having dynamically assigned IP addresses has caused me headaches in the past (I know from experience that if a camera suddenly chooses the same IP address that Sky is using, then you lose Sky and have problems with the camera).
Normally, once an ONVIF camera has been established on the network, all you do in SSS is ‘add’ a new camera, it scans, and finds it. You then select it, enter the necessary details, it activates, and you’re done.
SSS could not find the Reolink automatically, no matter how many times I scanned. So I moved on to option #2 in Reolink’s helpful guide to setting up in SSS, and entered everything manually. This time, and after several further failed attempts, I managed to ‘authenticate’ the settings (that means SSS has made successful contact with the camera), saw a tantalising thumbnail, then after trying to activate it the camera showed as ‘disconnected’. And nothing I tried would make it connect.
I now resorted to Google. Reolink instructs you to choose HTTP and Port 80 when setting up, and to use the camera model RLC-510A. But I discovered on Reddit that others who had been early adopters had found that HTTPS and Port 443 works. When I tried again using those settings, BINGO – it connected.
I should also point out that you need to log into the camera’s dashboard via its IP address and change a few advanced settings in there – notably, activating HTTP, ONVIF, and RTSP.
Another piece of advice. Get things working on a desk in front of you before putting the camera in it’s intended location. You absolutely do not want to screw it on to a wall, only to find out you’ve got to get access to the back of it again.
Setting up the Desktop App: This is fairly straightforward. You simply download the Reolink app and install it on your PC/laptop.
Early adopter comment: the app doesn’t receive push notifications yet. It just shows what your camera can see. As I commented on another detail earlier, Reolink are simply going to have to introduce push notifications – which are already available on the wi-fi version of this camera. You have to accept these minor details if you’re an early adopter!
So all I have to do now is run the cable and position the doorbell where I need it. Right now, the doorbell is on extended test next to me while I run the cables.
I’ll link to Part III of this series once it is in place and working as intended.
Back in 2020, I bought a Ring video doorbell and chime. The Ring is a wi-fi system, and it relies totally on Ring’s own cloud network. You cannot connect to it directly.
That wasn’t too much of a problem. It was necessary to buy range extenders for my home network to get a reliable connection (my router is upstairs at the back of the house, and the front door is downstairs at the front, so the signal was cripplingly weak), but I ended up with a ‘working’ system.
I used inverted commas there, because although it works, it does have a habit of dropping off the network, and needing a reboot of either it, or the range extender, or both (or maybe the entire network) – it’s done it as I write this – or of simply recording blank video when it detects a visitor, meaning you couldn’t see who came. The video can also be choppy and laggy – and if the internet goes down (well, your internet connection), it simply doesn’t work at all, because it has to be able to connect with the cloud to do so.
The problems are largely because it is wi-fi. I absolutely hate wi-fi at the best of times, and all my home networked stuff is hardwired wherever possible. I had tried wi-fi CCTV cameras, but they suffer the same problems – you need a strong network signal close to them. I also had similar issues with the Virgin Tivo box, because even sitting right next to the extender (the one I’d installed to fix the doorbell problems), the wi-fi network connection frequently decided it couldn’t connect properly. And Sky was the same. I fixed those by hardwiring them.
Now, one of the main selling points of the Ring system for me (offsetting the wi-fi downside) was the desktop app. It was a standalone app provided by Ring that allowed you to monitor the doorbell, and the advantage was that proximity and button press alerts came through almost immediately about 80-90% of the time. I spend most of my online time at my PC, and not hunched over my smartphone sending inane strings of emojis to hundreds of people I don’t know, so if someone comes to the door, I prefer my PC to tell me rather than my phone.
You see, the Ring doorbell system also has Chime units. You connect these to your network as well, and when someone comes to the door, the doorbell picks it up and tells the Chime units let you know wherever you have placed them. With the desktop app, the PC was another Chime system, which was useful when the two Chimes I had were installed in other rooms for the benefit of others in my family.
But a year or so ago, Ring announced it was going to discontinue the app and migrate everything to the cloud and a browser-based dashboard. I immediately knew this would cause problems, because it would cause further delays in the arrival of notifications – with the app, the doorbell spoke to the cloud, and the cloud spoke back and everything was triggered. There was a small delay (sometimes a long one), but not one that caused too many problems (though sometimes it did). By having a browser based system, absolutely everything was happening somewhere out there, and having to access it on the web meant going back out there to find it, then having ‘out there’ send it back to me. It’s not a real time system unless everything is perfect. As I said, if your internet connection goes down, you have no doorbell, because there’s no way to send anything out or get anything back. Oh yes, and let’s not forget the occasional problems at Ring’s end, with the cloud inaccessible – and Ring are just as bad as anyone else when it comes to announcing these episodes, or admitting to them).
The browser dashboard system was appallingly bad at the time, and Ring faced a huge backlash from owners. They delayed the switch-off of the app as a result, but it was still coming. As a result of all this, I started looking for alternatives. The panacea was an ONVIF camera which connected via PoE. ONVIF is a standard by which you can tap directly into the camera stream, and PoE means ‘power over Ethernet’ (you just plug the camera into your network using a cable, and it is supplied with both power and two-way data transfer. Note: you need a PoE switch or injector to provide the power. A standard ethernet port won’t work). The Ring system is entirely proprietary, and you can only access the camera stream and recorded footage through Ring’s own cloud system (and if you want recordings to be saved, you also have to pay an annual subscription – which galls when all it has done is record 20 seconds of black screen).
At that time, ONVIF/PoE doorbell cameras were almost non-existent, so I wrote about my intentions to build my own video doorbell camera. That idea got derailed when it occurred to me that a normal CCTV camera could do the job involving a lot less hassle, and although I have trialled that, the bloody problem is being able to get a suitable CCTV camera with a lens that works for close ups – there’s no real need for them, so they don’t exist. Oh, the cameras I’ve trialled do work, but the field of vision is just not right – if you want to see someone standing at the door, you need a very wide angle and not a zoom of any sort.
However, last week the Ring app began showing pop-ups declaring that it would cease to function in early June. Today, mine stopped working – and as I mentioned earlier, the f***ing thing has gone offline again. The final straw had arrived.
Last night, I was still prepared to go with the CCTV idea. After all, it worked, and if I moved the camera away from the front door to a place more to the right it would at least show me more detail. It wasn’t the best option, because you really need the camera near where the bell-push button is. But I decided to do another Google, and I was surprised to find that – now – ONVIF/PoE doorbells actually exist. They’re new, and it means being an early adopter, but they exist.
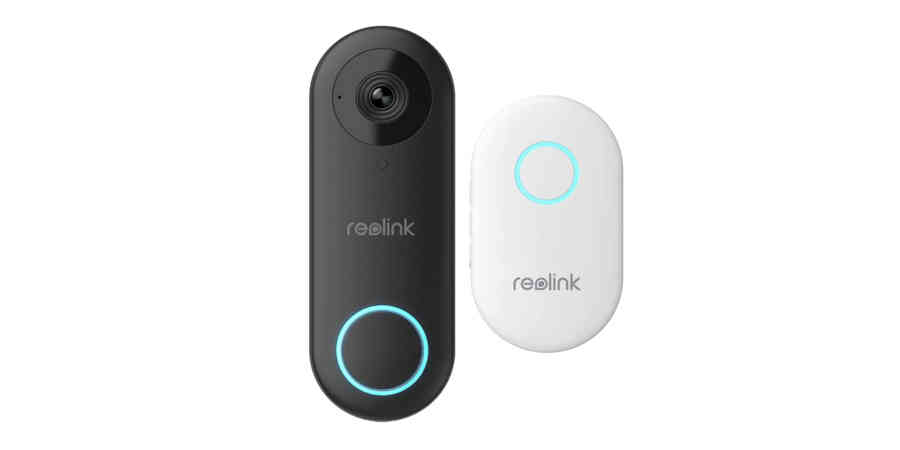
The one I latched on to after some research was the Reolink Smart 2K+ Wired PoE Video Doorbell with Chime. This is the Version 1 – it was only released late last year and only started shipping this year (there were lots of people complaining about awaiting shipment). So, remember what I said about being an early adopter.
Mine is on order (as of 4 June 2023), so watch this space for more detailed information. The Ring will be in the dustbin over the summer.
It’s 2023, and the warm Spring Bank Holiday weekend kick started interest in this article yet again. It was originally published in 2019.
Note that this article also applies to the JML InstaChill, Chill Tower, and any cooling device that costs under £100 and claims to just run ‘on water’ – even if it is manufactured by someone else.
In quick summary: these devices do not work to anything like the levels claimed. The original article follows.
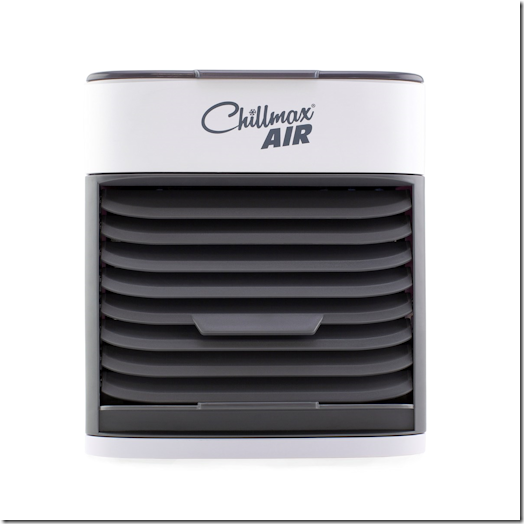
Early in July 2019, I saw the Chillmax Air advertised on TV in one of those shouty JML ads. That same evening, I was shopping in Asda and saw it on display. I am an idiot for things like this, and bought it on impulse so I could test whether it worked or not.
I’m a chemist, and I know that in order to cool a large space effectively you’re going to need something with a big fan and a special refrigerant. In practical terms, that means a fairly bulky device with a motor-driven compressor, a closed radiator for the refrigerant to pass through, a fan to suck air in and blow it across the radiator, and a wide exhaust pipe through the wall or window to get rid of the ‘removed heat’, and – in some cases – a drain for the condensed water which results from cooling the air. A typical proper air conditioner for a small or medium-sized room will be about the size of bedside cabinet. The Chillmax Air is not much bigger than six CD cases glued into a cube.
If you’ve ever used a normal desk fan you will know that you only feel cooler if you’re sweating a bit. That’s because the fan evaporates your sweat as it pushes air over it, and that evaporation is accompanied by a cooling effect – it’s called ‘evaporative cooling’. If you’re not sweating, you don’t feel the effect. Conversely, if the surrounding air is very humid, then no matter how powerful your fan is, you will feel little or no cooling because sweat can only evaporate if the air has capacity to hold additional moisture (I’ll explain that a bit more later, because it’s what determines whether the Chillmax is any good).
Many liquids exhibit the evaporative cooling effect. In the case of diethyl ether, for example (that’s the stuff they used to use as an anaesthetic), if you force it to evaporate very quickly you can even freeze water (if you do it properly). However, ether is both highly flammable and toxic, so apart from demonstrating it in the school lab (where I remember the fumes gave me a massive headache), it doesn’t have much practical application these days. Early refrigerators used it, which was spectacularly dangerous.
The Chillmax Air uses the evaporative cooling effect of water, and this is much less than with ether – similar to sweat, in fact. The unit consists of a reservoir at the top, which you fill with normal tap water, and this drips down on to a radiator unit which has ten sideways-stacked fibre panels in it through which a fan blows air. The water evaporates from the fibre panels, and the evaporatively cooled air comes out through the front grille. If you believed the ads, you’d be forgiven for thinking you’re going to get frostbite if you sit too close. I knew this wasn’t going to happen, but I wanted to know just how effective the Chillmax was.
When I first set it up and turned it on, the first thing I noticed was that the fan is quite powerful, so you get a good flow of air directed at you – but note that that it’s only a 5″ computer fan, so it can’t beat a proper desk fan for air flow. The air did seem a little cooler compared with what my desk fan was blowing at me, but it also felt ‘softer’ – that’s very important, and I’ll explain later. But the big question was how much cooler was the exhaust air?
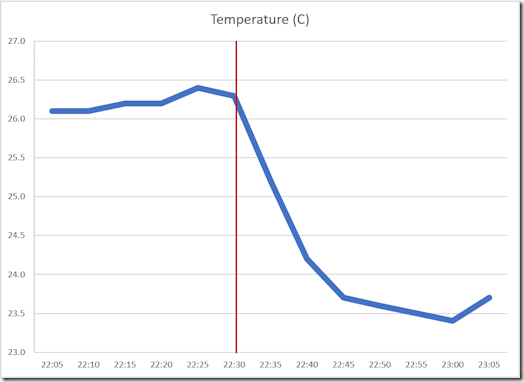
I fired up my trusty data logger and left it in front of my desk fan for 30 minutes for the control data. Then I powered up the Chillmax and moved the logger in front of it for the same period of time. This is what it recorded (the red line is where I moved it).
The ambient temperature where I ran the test was about 29ºC (this was just before the 2019 heatwave kicked in properly). The Chillmax brought this down by about 4ºC.
So, the Chillmax definitely cools the air that passes through it. Let’s work on the assumption that it would be able to get the same 4ºC drop no matter what the ambient temperature was. If your room is 38ºC, pulling it down to 34ºC still means it’s bloody hot. And also note that the Chillmax is physically quite small, so the cooling is very localised – it won’t cool an entire room down, and you have to have it less than a metre from your face to feel anything.
Now, some people might be thinking that a 4ºC is better than nothing at all. And they’d be right if it was just a matter of temperature. But there’s more to it than that. I mentioned that the exhaust from the Chillmax felt ‘softer’. I knew what it was, but my data logger shows it in numbers.
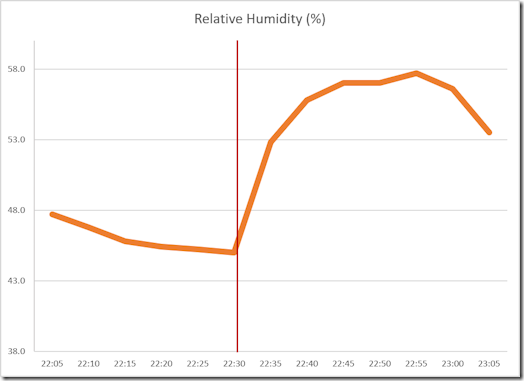
These are the data for relative humidity recorded at the same time as the temperature measurement, above (the red line is where I moved the logger). The humidity went up dramatically – a jump of about 30%RH.
As I’ve already explained, the Chillmax works by evaporating water on fibrous panels by forcing air across them. That water has got to go somewhere, and in this case it comes out with the cooled air as water vapour. In the right light, you can actually see it – it’s essentially fog, so the cooled air is also moistened. And just like when it’s foggy outside, and everywhere gets damp, this water vapour can condense on cooler surfaces. My data logger collected some and began to drip during the test, and I have since discovered that it also condenses on the front grille and can drip periodically, so you’d need to be careful what you had underneath it if you placed it on a shelf. The fan is quite powerful enough to project the drips forward slightly when they drop.
The ambient humidity in the room where I did the test was about 44%RH. The Chillmax sent that up to over 70%RH. It is this elevation of the humidity of the cooled air which really brings into question whether the Chillmax is worth the investment.
You’re probably aware that you can have a hot summer day in the high 20s where it is pleasant and comfortable, but a cooler and overcast day might be horribly sticky – or muggy. That’s because of the humidity, or water vapour in the air.
The amount of water vapour that air can hold varies with the temperature. Cold air can’t hold much, but warmer air can. At any temperature, once you reach the maximum amount possible, any extra vapour condenses out as liquid water – misted up windows, dampness, even drips and pools of moisture on window sills or under lamp posts. In winter, the condensation point is reached very easily, which is why you get your windows all steamed up and everywhere is often damp, but in hotter weather it is more appropriate to think ‘sauna’ (which is why it gets ‘muggy’). This air moisture is what we call ‘humidity’.
The term ‘humidity’ usually refers to the absolute humidity, which is amount of water in the air. However, the figure most people are referring to is the relative humidity. This is the amount of moisture in the air expressed as a percentage of the maximum amount it could hold at that temperature, hence the units %RH. It’s a complicated subject, but the important factor for us here is that when it is warm or hot, higher absolute humidity is uncomfortable because the amount of moisture in the air relative to the maximum possible is higher. Indeed, you may have seen weather forecasts where they give the actual temperature and the ‘feels like’ equivalent – that’s a reference to the ‘Heat Index’, which takes into account the effect of the %RH. Here’s a graphical chart for that.
As an example, if the air temperature is 30ºC and 50%RH, it will feel like 31ºC, but if the humidity goes up to 80%RH, then it will feel like 38ºC – even though the thermometer still tells you it’s 30ºC.
Another example. If the air temperature is 35ºC, at 50%RH it will feel like 41ºC, but send the humidity up to 80%RH and it’ll feel like 57ºC – even though the thermometer still reads 35ºC.
The calculation for this is complex (you should see how long my Excel formula for it is). It is non-linear, and the increase in ‘feels like’ is greater at higher temperatures. It also contains an element of opinion/perception, which is why there’s no point using numbers above about 60ºC. But the ‘Heat Index’ is what forecasters use. Incidentally, the official health designations for the colours are: yellow – caution; amber – extreme caution; orange – danger; and red – extreme danger. Vulnerable people need to take these into consideration before going out in hot weather.
However, this is where the problems come in for the Chillmax and similar devices. If it’s 35ºC and 40%RH, it’ll feel like 37ºC. Cool the air to 31ºC but send the humidity up to 80%RH, and it’ll feel like 41ºC. So it’s actually hotter in terms of comfort. Do the same comparison when the surrounding temperature is 38ºC, and the ‘feels like’ goes from 43ºC to over 50ºC!
At lower temperatures the Chillmax will produce a slight net cooling effect. But if the air temperature is above about 30ºC (and 50%RH) – which isn’t excessively hot or humid to start with, though it is around the point where you would start thinking about cooling things down – it’ll actually make you feel warmer. And if it is already humid outside, you’ll feel hotter still.
Proper air conditioners remove water from the air they cool. This removal of moisture is why the air from proper air conditioners feels crisp, as opposed to the ‘softness’ of moist air. The Chillmax does the opposite of normal A/Cs, and adds moisture.
Aesthetically speaking, the Chillmax is a cube – more or less – about 15cm along each side. There are two buttons on the top rear, one which changes the fan speed to one of three settings (or off), with a blue LED for each, and another button that turns the night light on or off. There’s a flap on the top front through which you add the water. The radiator system is a plastic-framed insert which you access by pulling the front grille out. It slots in and out easily. You can’t officially replace the fibre inserts in the radiator, but you can buy the whole radiator assembly from JML for £15. My only major gripe is the power cable. The jack plug that goes into the Chillmax is quite stubby and doesn’t go into the socket very far, so it is easy to dislodge it. However, the cable itself is quite long, and the mains plug is a moulded UK type.
JML claims the Chillmax can run for up to 10 hours per fill, but this is likely on the lowest of the three fan speeds, since on top speed it runs out in less than three hours. JML sells the humidification as a positive without relating it to the comfort relationship between temperature and %RH, but note what I said above. If you want to cool down in humid weather, it isn’t just the temperature that needs to come down.
Now. All of the above is an absolutely independent analysis. It came about simply from buying a Chillmax Air, testing it, then understanding what it was doing. None of the conclusions I arrived at were influenced by any other sources – I didn’t look it up first, nor have I had any inclination to do so since I first wrote the article. My measurements were factual, and my explanation was scientific. However, as of 2022 I decided to do just that and look up reviews of evaporative coolers. You might want to look at a few of these links, because I was right.
There are many, many more. And in every case, the relationship with humidity is the key. If it is already humid, evaporative coolers do not work and actually make things worse.
At the time of this most recent edit, it is 20 minutes past midnight on 19 July 2022 and the official Met Office temperature in Nottingham (where I am) is between 28ºC and 29ºC (it was just over 37ºC earlier on 18 July). Humidity is 35%RH, but it is up to 60%RH less than 40 miles away at the next Met Office station. In Nottingham, humidity peaked at 60%RH on 18 July, even if it dropped to under 30%RH at times. And that was outdoors – indoors you can add 30-40%RH without blinking.
Evaporative coolers are a big risk with the humidity we experience in the UK. And especially indoors.
Does it really work?
It does cool the air by a few degrees, so in that sense it works. However, it also sends the humidity up, and in most cases that actually makes you feel hotter and more uncomfortable. In that sense, it doesn’t work.
Will it cool more if I use ice water?
No. Evaporative coolers are not influenced significantly by the temperature of the water used in them. The temperature of the air that comes out depends on the temperature (and humidity) of the air going in, and the science of evaporation. Only this evaporation results in the cooling effect observed.
Will it cool more if I put the filter in the freezer?
It might – while you’re blowing air over ice. But once they defrost, which will happen in a few minutes in the temperatures you’ll likely be experiencing, then no. You’ll also have more condensate to deal with from the melted ice pouring out of the front grille.
You may see reviews on Amazon claiming that freezing the filters (or using ice cubes in the water tank) does give cooler air. Trust me – apart from what I just said about blowing air over ice, it doesn’t. Science is involved, and evaporative cooling doesn’t work like that.
Can I use it to cool my PC?
Someone found this article on the search term “jml chillmax air for pc cooling”. No. Blowing damp air into your PC would be dangerous, potentially expensive, and would only gain you 4ºC at best.
Can you get larger versions?
Until August 2021, the answer in relation to the ChillMax was no. However, I saw an advert (as shouty as usual) for the InstaChill tonight. Unlike the ChillMax, which is the size of a small table top radio, the InstaChill is the size of a bedside cabinet. And you can certainly get larger evaporative coolers from other manufacturers. The working principle is identical, except that the larger the surface area of water, and the greater the airflow over that water, then the greater will be the possible drop in temperature at the front end (and the more moisture being pumped out to increase the humidity). However, cooling effectiveness is influenced greatly by the RH of the air going in.
If the air is very dry, then a large evaporative cooler might be able to drop inlet air at 30ºC down by as much as 10ºC. However, if the inlet air is very humid, the temperature drop could be as little as 1ºC. In the UK, the realistic temperature drop you could expect on a non-humid day for a large cooler would be around 5-6ºC, but on a sticky day you’d only get about a 3ºC drop.
Suppliers of these devices say that they need good ventilation or extraction, and I would imagine that’s so the humid air can escape. If you’re evaporating more water to get better cooling on larger devices, you’re also producing a lot more water vapour, so the cooling effectiveness will decrease as the humidity rises unless you vent it somehow. Be careful if you read any of the reviews on these things – people may have noticed cooling in already cooler conditions, but trust me – if it’s very warm and humid, you will not notice any effect.
People say it works
Be careful when you read those one-line reviews. If you test it when it’s only 20ºC outside – as many of these people have – then yes, it blows noticeably cooler air at you. But science is involved, and at temperatures above about 28-30ºC you’ll actually feel hotter. The fact that it increases humidity is the key factor. Remember that the reason you even found this article was probably because it’s over 30ºC outside – the more above that it is, then the more hits I get.
So, does the Chillmax/InstaChill work?
They cool the inlet air by several degrees. But they send the humidity of that air up considerably, and this cancels out the benefits of the cooling effect when it is very hot. The ‘Heat Index’ is the key detail, as explained above. In the case of the InstaChill, it will add a lot more humidity than the ChillMax, and as I have explained and demonstrated, the ChillMax is bad enough when it comes to increasing the ‘feels like’ temperature.
Only the air being directed at you is cooler. Once that slightly cooler air has passed through warmer air, it’ll be close to ambient again. The device cannot cool down a room. It’s far too small for that.
Humidity can carry much further, though, and it hangs around unless it condenses out somewhere. So in a small room, you could easily increase the ‘ambient’ RH without any cooling at all, and that will make it feel even hotter. If it is already hot, the amount of water vapour the air can hold before reaching 100% RH will be substantial. The increased humidity of the outlet air does produce localised condensation, so you have to be careful to keep these devices away from electrical sockets where they might drip on them, and there is also the risk of dampness in your home and the problems that it can cause. The devices also contain a significant volume of water when full, so you don’t want to knock them over.
Should I buy one?
My advice is to buy a proper air conditioner (A/C). If anything costs under £200 it is not a proper A/C. However, it is possible some people might find the minor cooling effect and increased humidity of the Chillmax/InstaChill (and similar devices) beneficial, so the choice is yours. But for real cooling and dehumidification when it is hot, it has to be a proper A/C.
I know this makes me look like a hypocrite, but read on.
Most readers will know that I display ads on this blog. They are purposely not intended to be obtrusive, and I only put them at the end of articles (sometimes in the middle if it’s a long article). The ones at the end/middle of articles are Google ads, and the content is random (as is the one shown in the sidebar). I refuse outright to include pop ups, and I don’t control what any of them show (it’s either random, or based purely on the reader’s browsing habits, and nothing to do with me).
I sometimes use very specific ads pointing to products I am recommending within the article, and those are usually Amazon or eBay ones. I never consciously put ads on pages announcing deaths or other serious issues (I consciously don’t unless I made a mistake).
I do earn a small amount of revenue from the ads, but I’m never going to be able to retire on it – I just get a £60 deposit into my bank account every now and then when I hit that figure.
When I am browsing myself, I have no problem with normal ads. If I see one of interest, I will click on it. But I draw the line at repeated and obtrusive pop-up ones, and those local newspaper websites which are run collectively by The Mirror Group (also known as MGN, and part of Reach PLC). With those, the entire page is filled with ads and pop-ups.
For some years, I was using AdBlock Plus to stop them, and was very happy with it. However, I have tried twice recently to upgrade to the subscription service they offer due to some ads not being blocked in the free version, and it simply wouldn’t install. Oh, Eyeo GMBH (the software owner/publisher) happily accepted my subscription, but the upgrade simply wouldn’t do anything, and the installer told me to contact tech support. I did that, and they were fucking useless. Twice. They hadn’t got a clue what they were talking about and did the usual trick of trying to get me to uninstall things as if it were my fault, and then wanted me to try subscribing again – even though I had a clear active subscription to them within PayPal (actually, I had two subscriptions already, the first from an attempt in January to upgrade). No way was I going to set up a third.
I washed my hands of them there and then, removed AdBlock Plus from my system, cancelled the original subscription, got a refund for the second, and then went looking for an alternative. I soon found uBlock Origin.
This is what my local newspaper looks like without an ad blocker:
Let’s be clear, this is quite tame compared with what can happen on some pages. The web designers are amateurish beyond belief and can make it ten times worse than this quite often. All Reach/MGN websites – virtually every local news outlet in the country – is exactly the same. But this is what it looks like with uBlock Origin enabled:
It gets rid of everything. And this is what an article with an embedded video looks like:
That image is a frame from a video, which actually loads and plays – AdBlock would just block the video. And it also blocks ads on YouTube videos, so you don’t get a load of crap before the content you want.
First of all, uBlock Origin is open source, so it doesn’t cost anything. You can’t even donate (because I would if I could) – they refuse donations outright. But it bloody well works like all get out. It seems to stop everything, especially the ones that had begun to creep through with MGN/Reach.
As I said, a major benefit is that whereas AdBlock prevented videos being loaded or displayed (they’d just buffer permanently), and there appeared no way to get round that, uBlock doesn’t – but it still suppresses all the annoying ads. And disabling it then re-enabling it is extremely easy if something you want to see is blocked.
It is very light on resources, too. It runs on most popular browsers as an extension. I really recommend it.
I’ve been with Virgin Media since they took over NTL in 2010, and to be fair I haven’t had many problems with them – and certainly not ones you could turn against them for. I can count on the fingers of one hand the number of times I’ve needed to call them.
I’ve had hubs break, which they send out replacements for, of course. And there was the problem with POP mail servers a while back. But apart from the time a prick of a boy racer took his mum’s car without permission one morning and spun it out into the main local hub on my estate (it took a week to rebuild, and my only complaint about VM is that they wouldn’t give me his address), no major outages.
VM gets a lot of negative press because its call centre is in India, and as we know, absolutely no one in the UK is racist – it’s just that they just don’t like foreigners, especially if they have dark skin, and are prepared to burn them if they get themselves worked up enough about it. But they’re not racist, of course.
I don’t care that the call centre is in India, and enjoy a chat with them about the weather. My gripe is that it is a call centre in the first place – and that’s because I used to work in one (for a while, when I was training to be an ADI), and know full well how they operate. That gripe was given wings a few days ago.
I started to have connection issues. Not a complete loss of service at that point, but niggly little things, including my Birdcam stream playing up. I rebooted my router, and that didn’t fix it. Then I rebooted the Superhub (which I have set to modem mode), and that broke it completely. The hub was now flashing a blue ring light after each attempt to negotiate a connection. This is where the fun began, because it was necessary to call tech support.
I got through almost immediately – after the usual laboriously slow ‘two letters from your password’ thing, which never works, and didn’t work this time, either. Then they asked me my security questions, one of which was the amount of my last bill. I explained (without giving in to the temptation to swear) that I couldn’t get online to check, so could they ask a different question? But they couldn’t. Fortunately, my last bill was the same as the one before, which I could check in my inbox in Outlook (I’d have been well screwed if I used online email). It was the right answer, so the tech support part of the call commenced.
No, there isn’t a fault with the network (oh, really?) Yes, I’ve rebooted my computer, my modem (I explained my configuration), and my router. And yes, it was still not connecting. No, there is nothing else connected to the hub apart from the router (I explained my configuration again, and emphasised that the VM hub was not connecting to the VM-supplied internet feed, and that my local network on the other side of the chain was working fine), but I disconnected the router, and yes, after rebooting the hub yet again it was still not connecting. They ‘sent out a signal’ at least four times, and I rebooted the Superhub as many times. Yes, we have exactly the same problem.
Finally, they had me press the factory reset button on the Superhub, and then told me it could take up to an hour for the thing to come back online if it was fixed. So that’s where the call ended. She asked if there was anything else she could help me with today, and I laughed and said ‘I know you have to ask that, but I don’t think you really can do anything else until my connection is back up’. She thought that was funny, too. We had a quick chat about Mumbai, then the call ended (it lasted 59 minutes).
An hour later and everything was still down. But as a result of the withdrawal symptoms I was experiencing, I had set my phone up as a hotspot and was hammering my mobile data allowance using my laptop. The first thing I did was head on over to Downdetector, where it immediately became clear that user reports of no internet had gone through the roof at exactly the time I had first encountered problems. It was so severe that the national media reported on it the next day. Next morning, the hub was glowing a healthy… white (it had been green previously). Judging by the various emails I get from my security software, the problem started around 4pm (when I noticed it), and was fixed at 6.20am next day.
But the call centre didn’t know about it!
After a bit of messing about repairing the damage caused by doing the factory reset (Superhub back in Superhub mode (that’s why it was white instead of green), password reset to factory default, IP address ‘wrong’ as a result (so the camera stream RTSP was wrong), and so on), I got my Birdcam streaming again and we were back up – other than for the fact that whatever the problem was, it still keeps coming back (as in this afternoon, where I was having problems getting on to websites, and noted an increase in reports on Downdetector again).
The problem with VM isn’t that its call centre is in India. The problem is that it is a huge company which has appalling communication, and regular readers will know that I experienced that for many years when I was in the rat race. Oh, the call centre is part of the problem, to be sure – but only because it is a call centre, which as I mentioned, I have plenty of experience of.
Any real problems I have ever experienced with VM have always ultimately turned out to be problems at VM’s end, though they never admit to it in the call centre. That’s because they aren’t allowed to unless it is a transient one – they absolutely will not admit to hardware or network faults. Only Head Office will do that. But the call centre always proceeds as if the fault is at my end.
The one I worked in wasn’t quite as bad, but it wasn’t far off in many cases. Agents were ordered to go through all the simple routine things before proceeding to anything bigger, and that could easily mean customers being asked to run disk defragmentations on computers they’d bought that morning, or stupid ‘resets’ even though they called in about a bang, a flash, and then smoke – especially if the agent they had come through to was inexperienced and a stickler for the rules.
The trick to getting around VM’s ridiculous tech support issues is to write to their Head Office. They told me that they have to follow up any such communications, and things get sorted out much quicker using UK-based technical staff. You used to be able to email Head Office, but they’ve closed that off now (the last time I did it, I emailed Richard Branson and that did the trick – they admitted there was an ongoing issue with the POP email servers and also gave me a timeline for the fix. The tech support line was still blaming me – and so were the VM support forum ‘experts’).
Edit 10/05/2023: It happened again for most of the morning until mid-afternoon. However, after an hour or so, the camera stopped streaming properly again, even though it is still technically online at my US-based streaming provider (they tell me clearly when it is offline).
Edit 11/05/2023: It’s happening again this morning (camera stream not working correctly). It cleared up for a couple of hours, then it started again just before 2pm. That was for a short time, and it has now started again around 3.20pm.
Camera reboots twice daily, at 00:00 and 12:00 GMT – 60 seconds duration. Note that I said GMT – most readers are from the UK, so that means plus 1 hour in the Summer.
Apologies for any corrupted feeds – I’m trying to get to the bottom of it when it happens.
It looks like we’ve missed out this year (2023). We’ve had around four or five visitors, who have checked out the box during late March and April, but by now (late April) I think we’ve missed the boat and they will have gone elsewhere.
Last year, of course, we hit pay dirt the first time around. But this is nature. They’re obviously looking, but those who looked this year decided not to.
Que sera.
As I mentioned when I first published this, I am using a much better streaming host – Brownrice – whose service is excellent, covers the resolution of my camera without repeated buffering, and whose support staff are immediately available for any issues (bearing in mind the 7-hour time difference which, oddly enough, actually works for me).
I’ve just had to put another camera in the box. The first one was wi-fi, and after a lot of extra bits and pieces to be able to get a signal at the end of the garden, the bird who took up initial residence last year broke the antenna off. The second, which was hard wired, stopped working after last year’s sad events had played out, and the third stopped a few weeks ago. I’m using a different brand now, so let’s see how that goes. Right now, the only resident is a spider.
Last year, we had a roosting Great Tit. She turned out to be female, and in early Spring she built a nest. She then laid nine eggs over a ten-day period, and all of them hatched. She and the male bird fed them regularly and they grew and developed all their feathers. They must have only been a short way from fledging when both parents stopped coming. I incorrectly assumed they were trying to get them outside, but the chicks weren’t old enough.
One by one, they died. The last night was awful, as there were still five chicks jumping around, then as night fell they all settled down and just died.
My other CCTV cameras show that there are at least three cats which prowl our garden at night. One of them – which I think belongs to neighbours at the bottom of the garden – is a cute and friendly little black and white thing, but it regularly goes for birds in our garden. I’ve seen it after our resident Blackbird, which my mother virtually handfeeds, along with two Robins. Since our garden has a lot of trees and bushes and is well maintained, we attract (and have feeders for) wildlife.
I’d never hurt the cat, as I am a cat lover, but I want to deter it, because there’s a high probability it was responsible for the disappearance of the chicks’ parents last year. So I bought my mother a Spyra water gun and she is surprisingly good with it.
Regular readers will know that I have been taking card payments from my pupils since 2013. It’ll be ten years this September! How time flies.
I originally used iZettle, which I was happy with. I’d initially wanted to use PayPal Here, but their sales rep got something wrapped around his neck at the time, and so I decided against it and went with iZettle.
Everything was fine for a couple of years, but one time there was an app update which wouldn’t install on my phone (which had worked perfectly well up until that point). I contacted iZettle and they told me my phone wasn’t supported. When I questioned that, pointing out it had always worked before, their precise words amounted to:
Your phone isn’t supported. Goodbye.
iZettle Support in 2015
I’m not making that up. It is precisely what they said. And it nearly destroyed my business overnight, since I had no way of taking most of my payments.
I contacted PayPal, who by now knew what their system actually did, and quickly purchased one of their readers. It worked like a charm, and it was better than iZettle in that money went into my PayPal account instantly, instead of after (3 days + not weekends + not bank holidays (UK) + not public holidays (Sweden)).
iZettle got back to me some time later (quite a long time later, in fact) after I had left withering reviews in various places about their awful service, and it turned out that the reason the app wouldn’t install was that the incompetent prats had put out a package on the Google Store that had the same filename as the previous version. That was the cause of the problem.
I basically told them to f**k off, and I’ve been happy with PayPal Here ever since.
A cool wind of apprehension blew over me in 2018, when PayPal took over iZettle. The wind blew a bit stronger when PayPal stopped supplying the PayPal Here card reader, and began pushing the iZettle (or Zettle) terminal. I’d taken a sacred vow never to use iZettle again, and it didn’t matter anyway, because I already had four PayPal Here readers to cover any breakages, so didn’t worry too much. I didn’t think it would affect me for a long time, as PayPal had never told me the Here service would stop, and I’d only had one terminal fail in ten years, so I was pretty much set until I retired. But it turns out I was wrong – and I am not happy with PayPal for not telling me in advance.
In fact, the first I knew of it was early March, when I had a voicemail which informed me in an American accent that the PayPal Here card readers would stop functioning from the beginning of April 2023. I tried to contact them, but they haven’t bothered to respond in the two weeks since I tried. This is annoying when you consider that I must have taken around £100k using PayPal Here since 2015.
So I immediately took action to ensure I can continue taking card payments.
Zettle can still f**k off. They are the same Swedish company that tried to put me out of business, even if PayPal now owns them. I would not use them again under any circumstances. And now PayPal is pencilled in on my list of people I don’t trust anymore.
So it came down to either SumUp or Square. And then it came down to either an all-singing, all-dancing standalone 3G terminal, or one that connected via an app to my phone. I was a bit concerned about some users complaining about signal strength on the 3G devices (if a pupil lives in the sticks, that can be an issue even with my 5G phone), so I went with an app-based one. And the SumUp one looked better, so it was decision made.
I’ll review it separately in a few days. Right now, it is set up and ready to take payments, but I am waiting for my business Mastercard to arrive so that I can gain the ability to transfer money to my bank account on a (almost) daily basis.
I’ve mentioned before, but I build my own PCs. I began doing it nearly 30 years ago, when one of my early PCs broke down.
In those days, unless you could afford one of the business computers from the big manufacturers (which were hugely expensive), you’d usually get your machine from one of the many popup PC manufacturers which started appearing. Back then, we also had a recognisable high street, and many vendors had shops you could visit to order your machine. They were very affordable – but I discovered the main reason for that.
I’ve always been into electronics, and expanding these machines was usually one of the first things many owners did, even if they were working. Extra memory, another hard drive or CD-ROM (or maybe just a CD-ROM because you hadn’t got one already). But with ownership, the need to go inside to replace things which had broken also became something you expected sooner or later.
The first time I opened one, I was amazed at how empty the case was (and don’t even get me started on the razor-sharp burrs on the crappy cases). A cut-down motherboard with onboard graphics, and cables to the hard drive, the CD-ROM, and the power supply was all that was in there. Then one time, my PC failed completely and I identified that the power supply (PSU) had blown.
When I contacted the shop, they told me they could get me a PSU and it would cost £80 (I’d fit it myself). But that was far more expensive than what I’d seen in the magazines at that time. PSUs went for maybe £20-£30. The problem was, the PSU in my machine – and most machines sold cheaply those days – was a cut-down import from the Far East. It was smaller than a standard PSU, and could only be obtained either by import, or from someone who’d already imported them (i.e. the people charging £80).
I then realised my machine’s case was a standard tower case, and the place where the PSU sits would take a standard sized replacement. So I bought one, fitted it (all the screw holes still lined up), and the machine was fine again. That was until a year or two later, when it (or whatever machine I had) blew again, and this time it wasn’t the PSU.
That was when I built my first one from scratch. I sourced all of the parts from eBuyer (and have done ever since then), and deliberately specced my machine as high as I could afford so it would last for several years before needing another major upgrade. Since then, I’ve built at least five.
Now we’re getting to the point. The last one, I specced very highly. When I ran the benchmark tests after I powered it for the first time, it was in the top 1% in the world for speed and other features. But I’d also chosen the Thermaltake Level 20 GT case for it.
The Level 20 GT is a beast. Even with nothing added to it, it weights about 20kg, but the full working system is well over 30kg. And that means that unless you live in the most open-plan and minimalist environment (and I don’t), once you’ve put it somewhere you don’t really want to be having to move it out regularly – or in my case, at all, unless it can be avoided. And it is big enough that when you do position it, you don’t want it in the middle of the room. It goes on or under somewhere, next to a wall.
Now, anyone with even a basic understanding of computers that run off the mains and can do fancy things will know that apart from their functionality, they are also effectively big Hoovers. The fans suck in air to blow over the components inside to cool them down. And air contains dust (especially in a bedroom or home office). Over time, that dust collects on the grilles, the fans, and eventually even on the components inside. The grilles and fans are the first to be affected, and if you don’t do anything the airflow is reduced and your PC starts to overheat.
My PC has not overheated. But I had noticed a build up of dust on the front grille covering the front fans. In fact, I first became aware (and moderately concerned) about it a couple of years ago. I tried to removed the front panel, but could see no way except by relocating my 30-40kg monster and partially dismantling it. Yet there were no obvious screws to remove.
I’d Googled it, and the only advice (and not much of it) was that the grille pulled off, but this was confused by other advice that you needed to get at something inside (clips). I was also mindful of the initial assembly of my system, and all the myriad screws necessary to accomplish that – so I was still kind of assuming screws would be involved somewhere. But they aren’t.
I’d tried pulling it before, but I was being very gentle for fear of breaking it. Periodically, I’d had another feel underneath to see if I could find something I’d missed, and had another few gentle pulls to no avail. This is over a period of two or more years, you understand. And trust me, it isn’t in the manual.
But yesterday, I decided to sort it once and for all. Again, I’d seen the advice that it pulls off, and this time I wasn’t so gentle. I gave it a good sharp tug at the bottom (see photo, the arrow shows where there is a grab slot about 3cm back underneath) and it popped out surprisingly easily considering the problems I’d had before. I ran my fingers up the side and pulled at the top and it came off easily.
Once out, the tempered glass panel has to be removed, and this is held by four short screws (so do it on a table). Once these were removed, the glass panel was free and the grille could be cleaned. I used a paintbrush to get the main bulk of dust off, then an air blower to remove the smaller stuff. I could have washed it using water, but it was now completely dust free and so didn’t bother.
Once I’d screwed the glass panel back in, I re-positioned the whole front panel against the case, located the clips into their slots (important), then gave it a sharp tap in each corner to push them back into place.
I simply cannot believe that this has flummoxed me for as long as it has, when it turned out to be so simple.
As a footnote, can I point out that my PC doesn’t have loads of poncey colours flashing all over the place. Mine is a muted red colour.