Well, following on from my previous post on this project, the metal has arrived!
You can find Part #2 of this project here.
I’m just drawing up the plan I need for the component parts at the moment. I also nipped into Makro today and bought a few tools to make the job easier.
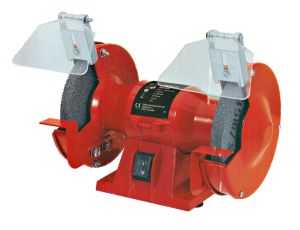
 Makro stocks a wide range of tools, especially the Fairline range. In the original post Welding Isn’t Easy I mentioned that I’d bought a Fairline arc welder – well, today I also bought a bench grinder . Hard to believe that it only cost £14.99! EDIT: Note that in the finished project I never actually used the grinder.
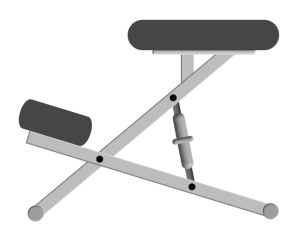
Looking at the poorly-built original chair I’m using as a template, one of the key weaknesses is the way the seat is attached to the main struts (and that’s apart from the fact that they didn’t weld it on all sides). The two struts are welded on to the plate at an angle of about 40° and although the angle itself isn’t crtitical, the fact that having only two contact points means that repeated standing up and sitting down flexes the  metal slightly. This eventually leads to fractures along lines of weakness – either the weld or across the strut itself. It’s all about cutting costs to save money as far as the manufacturers are concerned.
What I’m going to do is include a pair of smaller struts projecting almost vertically from the main struts on to the seat plate (these are not on the original – see diagram to the left). This will give four points of contact and create a strong triangular section (which adds strength). Combined with the fact I have chosen 2.5mm thick box section (the original looks to be about half this), it should yield a very strong finished article.
EDIT (20 May 2009): Incidentally, I was playing with various bits of software tonight and I’ve decided that there is no way I am going anywhere near drawing up a proper blueprint. I’d be here until Christmas! My sketches will be made using my existing art packages, which I know how to use properly.
Instead, I’m going to work out the dimensions of each component, produce them, then assemble them as sub-assemblies in stages. I’ve already measured up the existing chair and the most critical part is going to be making sure the spacing between the pairs of struts is correct to allow them to be inserted one inside the other.
EDIT: If you came to this page from a search engine, don’t forget to look for Kneeling Chair Project parts (#1), #2, #3, and #4 (plus a couple of updates) using the site search facility. This project is now complete and there are drawings/blueprints in the other parts.